As businesses continue to embrace remote and hybrid work, providing employees with secure, scalable, and flexible access to corporate resources has become essential. Azure Virtual Desktop (AVD) formerly known as Windows Virtual Desktop offers exactly that. It allows users to access a full Windows 10 or 11 desktop experience from anywhere, on any device, without compromising security or performance.
In this post, we’ll walk through the key steps to deploy Azure Virtual Desktop (AVD) successfully in your organization, along with best practices to ensure optimal performance and cost-efficiency.
What Is Azure Virtual Desktop (AVD)?
Azure Virtual Desktop is a Microsoft-managed Desktop-as-a-Service (DaaS) solution that enables organizations to virtualize Windows desktops and apps in the cloud. It provides centralized management, scalability, and integration with Microsoft 365 and Microsoft Entra ID.
Key Benefits:
- Secure Remote Access: Built-in integration with Microsoft Entra ID, MFA, and Conditional Access.
- Scalability: Easily scale up or down based on demand.
- Cost Efficiency: Pay only for the virtual machines (VMs) and storage you use.
- Productivity: Seamless integration with Microsoft 365.
Deployment Steps
Step 1: Plan Your AVD Deployment
Before you start deploying, proper planning is critical. You’ll need to determine the following:
- User requirements (number of users, session types — pooled or personal)
- Applications that users need access to.
- Azure region where you’ll host your environment.
- Identity integration (Microsoft Entra ID joined, or Hybrid AD joined)
- Storage strategy (FSLogix profiles, Azure Files, or Azure NetApp Files)
Step 2: Prepare Azure Resources
- Verify or Create an Azure Subscription
- Confirm you have a valid Azure subscription with sufficient permissions (Owner or Contributor).
- Review your Azure billing structure, quotas, and policies to ensure you have the required compute and storage capacity.
- If deploying for multiple business units, consider using separate subscriptions or management groups for better governance.
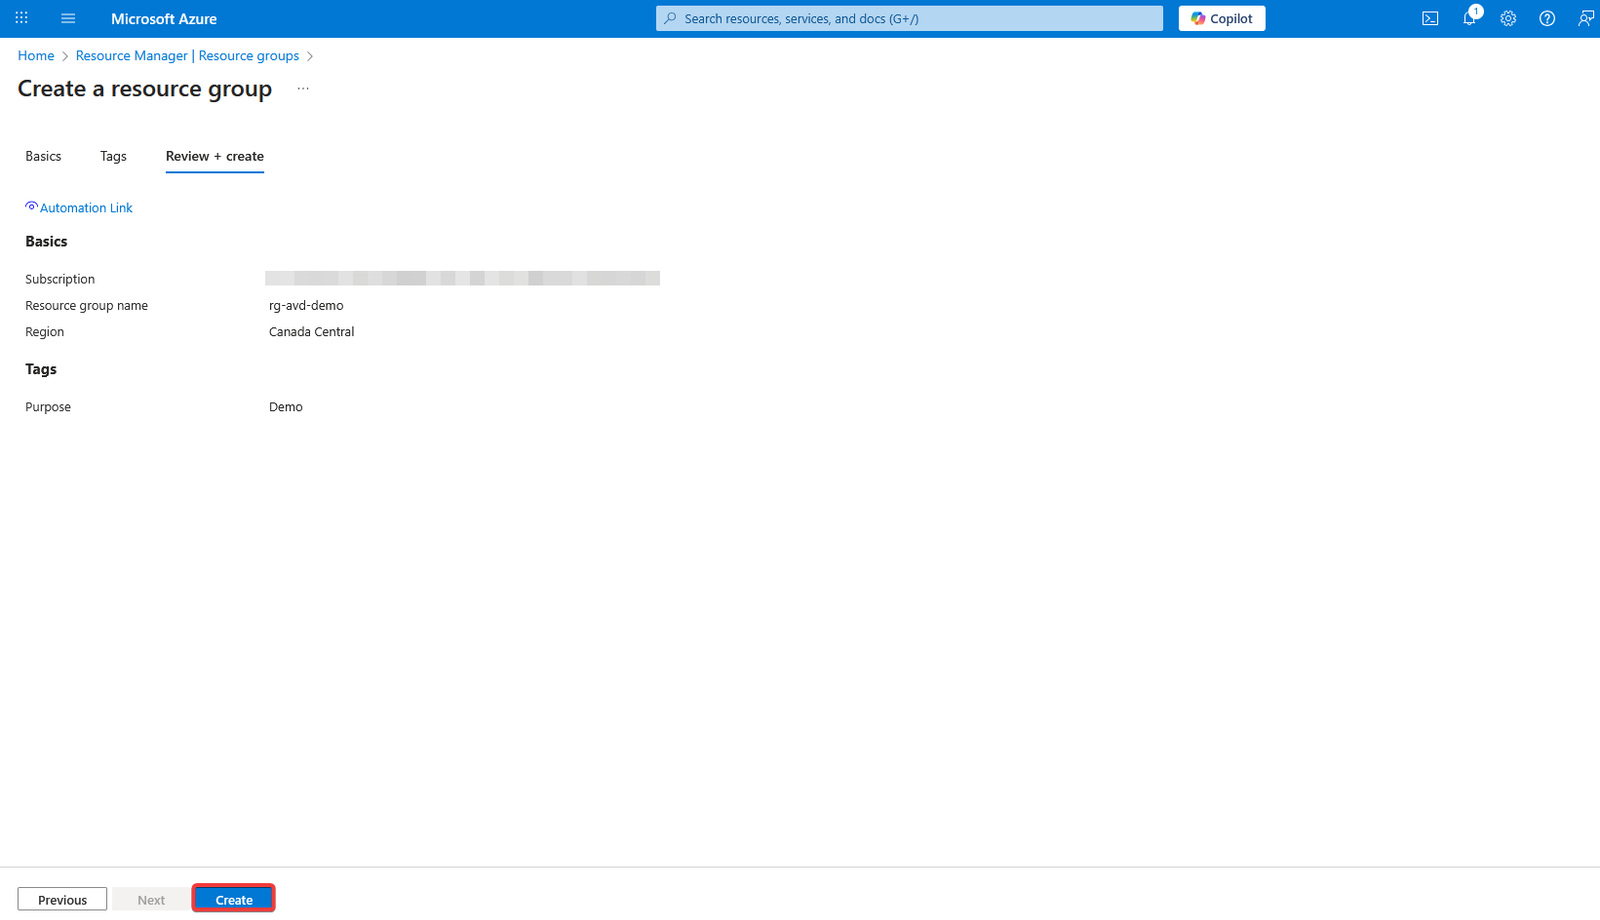
- Create a Resource Group: Organize all AVD-related resources (network, VMs, storage, etc.) into a single group.
You can follow the steps below to create a Resource Group in Azure:
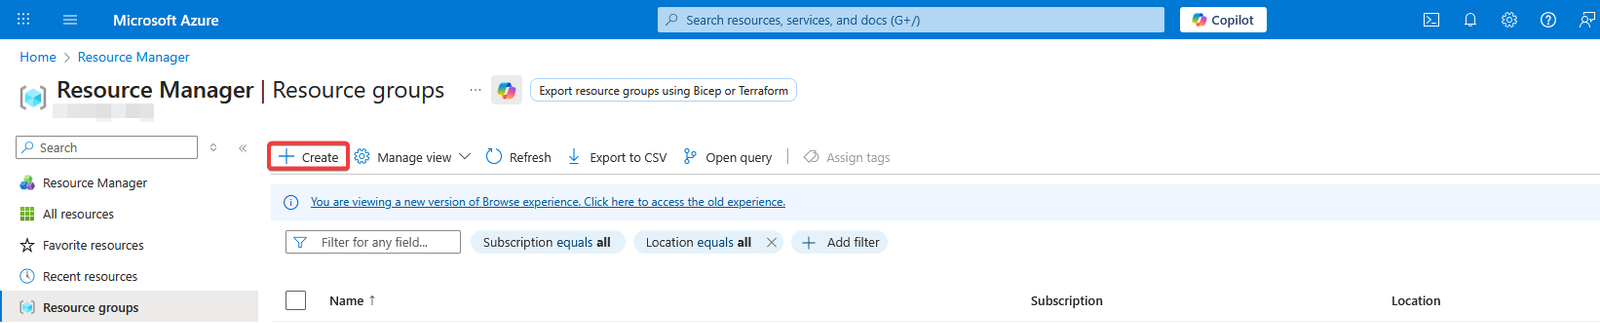
- Go to the Azure Portal homepage and type resource groups in the search bar. That will open the Resource Manager
- On the Resource Manager page click on Create.
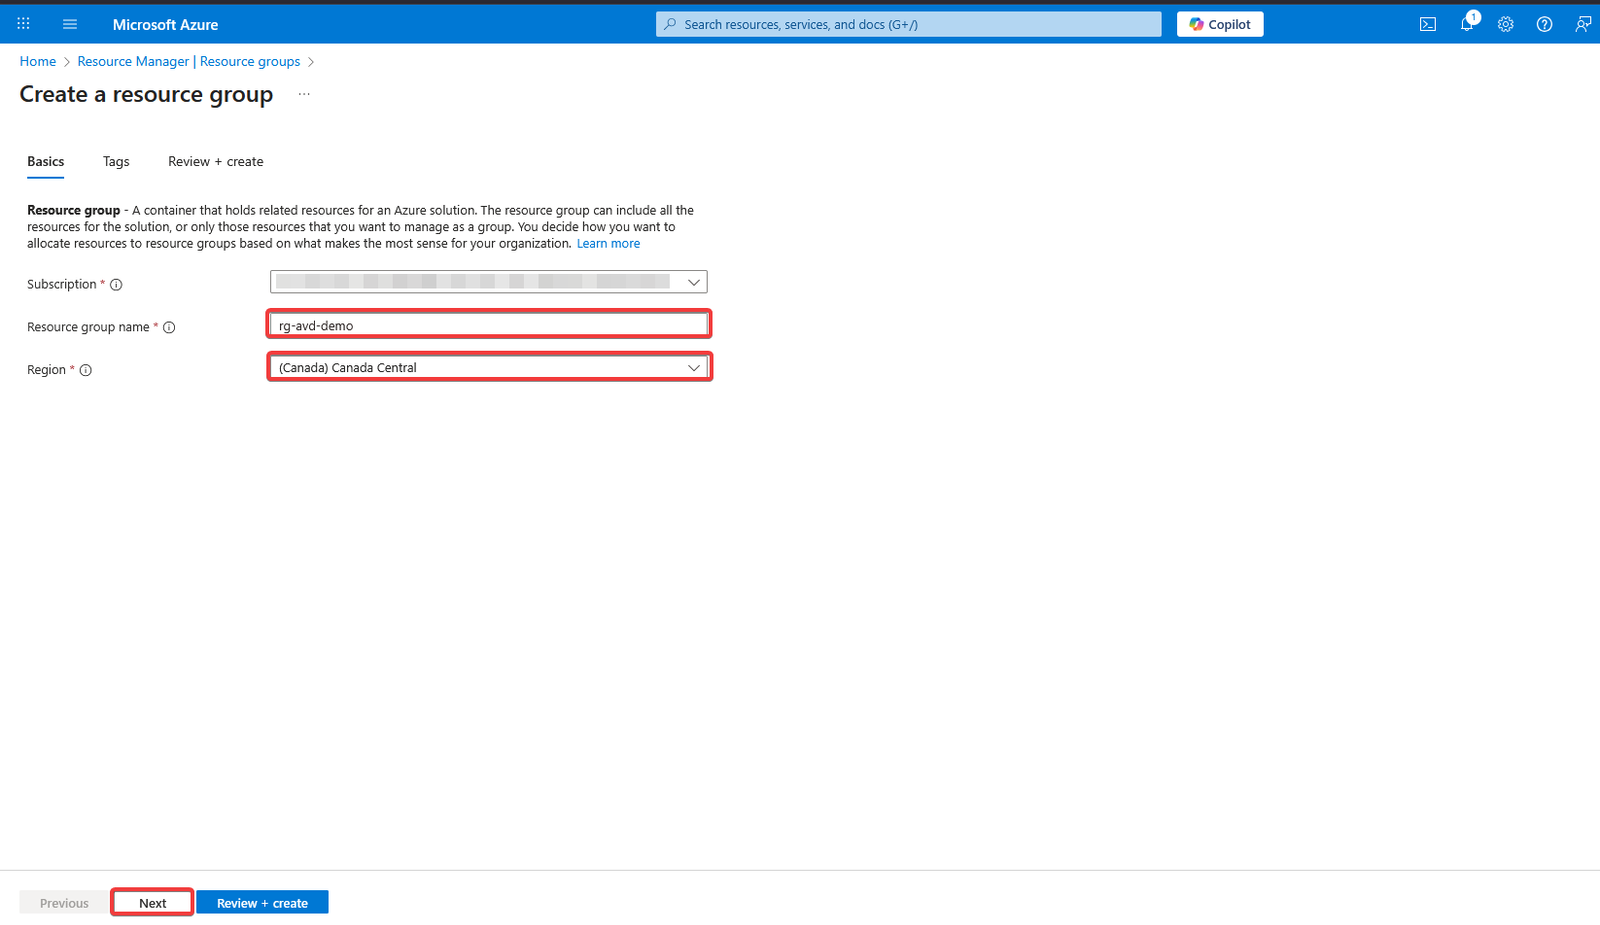
- Next select a Subscription where you want the resource group and the AVD resources created. Provide a Resource group name and select a Region where you want the resource group created and click Next.
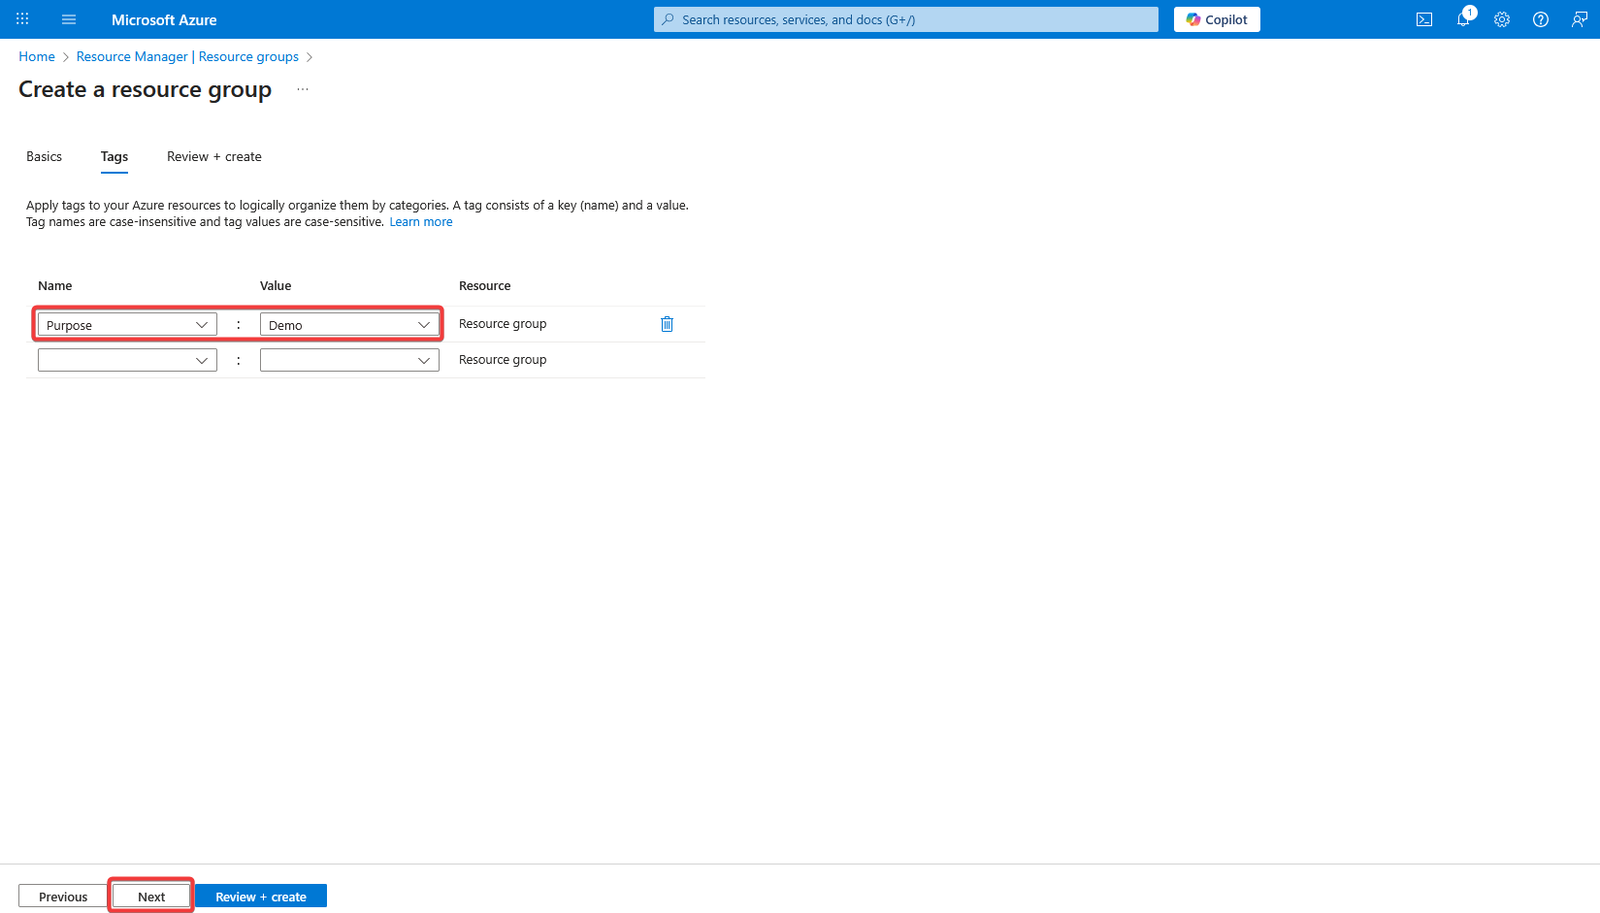
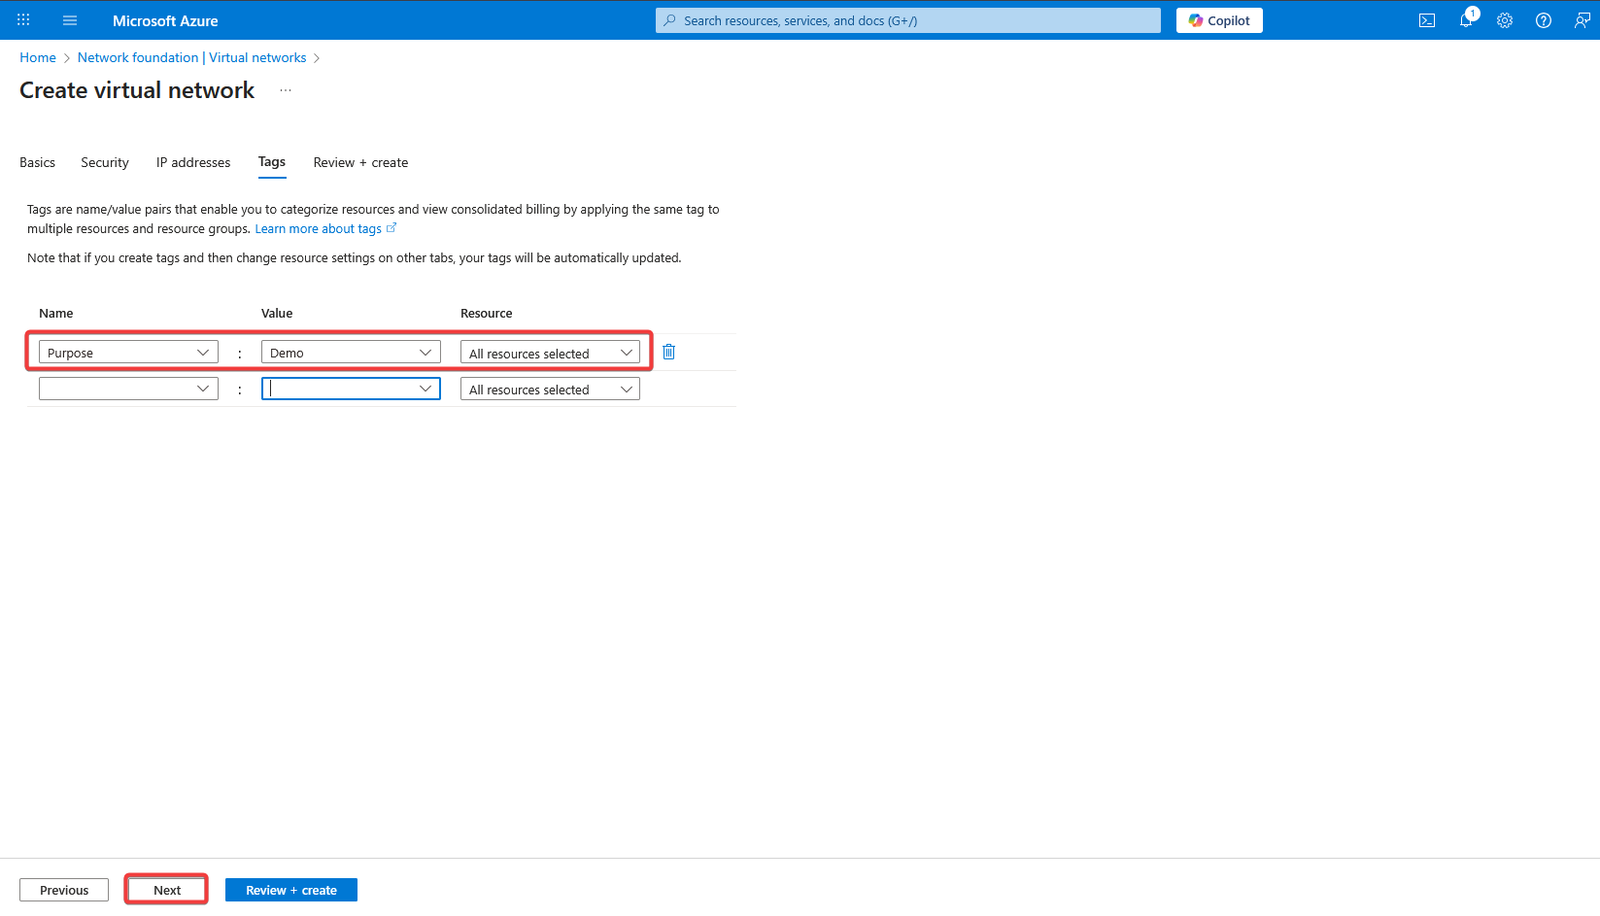
- On the next page, you can apply tags (optional, but highly recommended). Tagging your resources helps with organization, cost management, and easier identification across your Azure environment. Click Next
- Next Review and Create
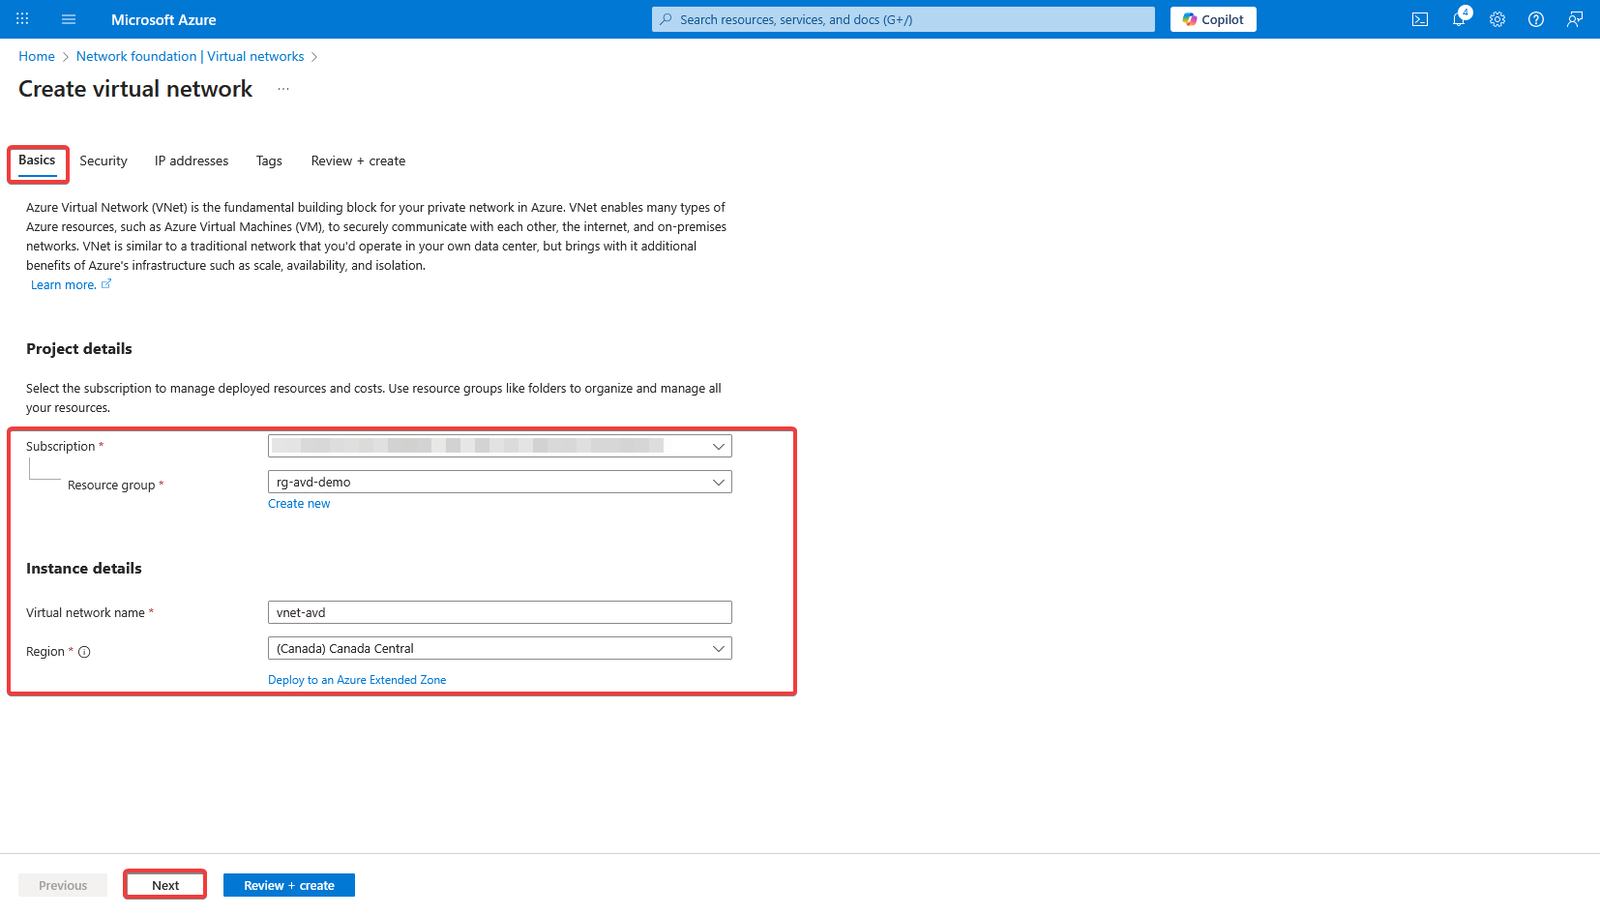
- Configure Virtual Network (VNet)
You can follow the steps below to create a Virtual Network in Azure:
- Under the Basics tab Select your Subscription
- Select the Resource Group we created earlier.
- Enter a Virtual network name.
- Next, select the same Azure Region where you created your Resource Group earlier.
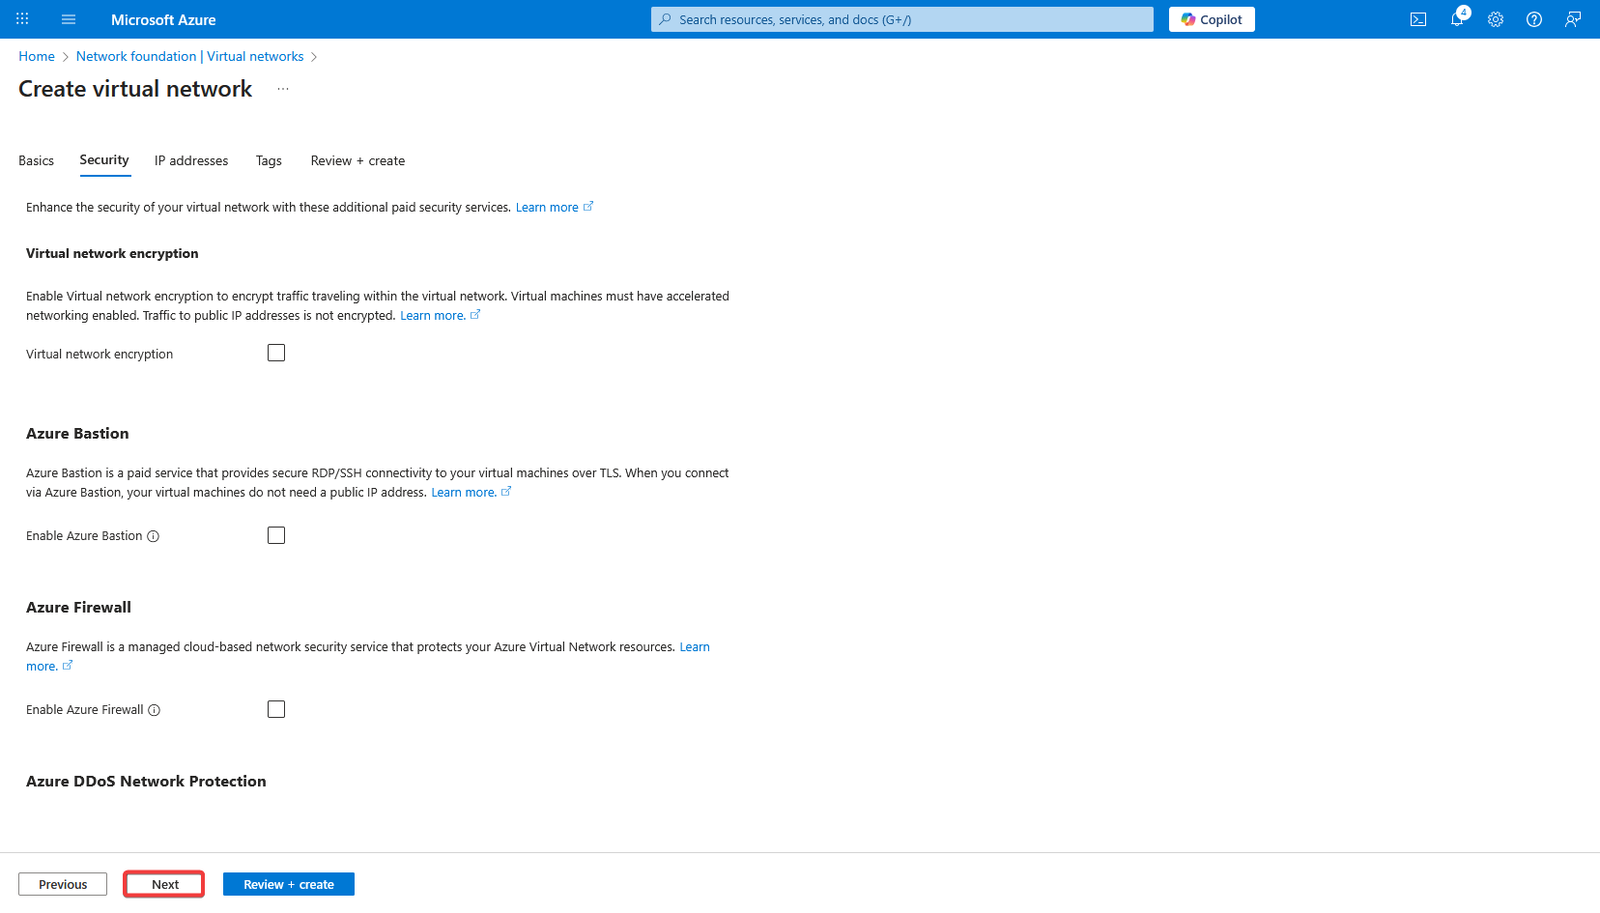
- Click Next to be taken to the Security tab.
- Leave the security settings as default and click Next to go to the IP addresses tab.
- In the IP addresses tab set the IP address space and subnet that is appropriate for your needs. For this tutorial, we’ll set the address space to 10.10.0.0/24 and leave the default subnet.
- Click Next.
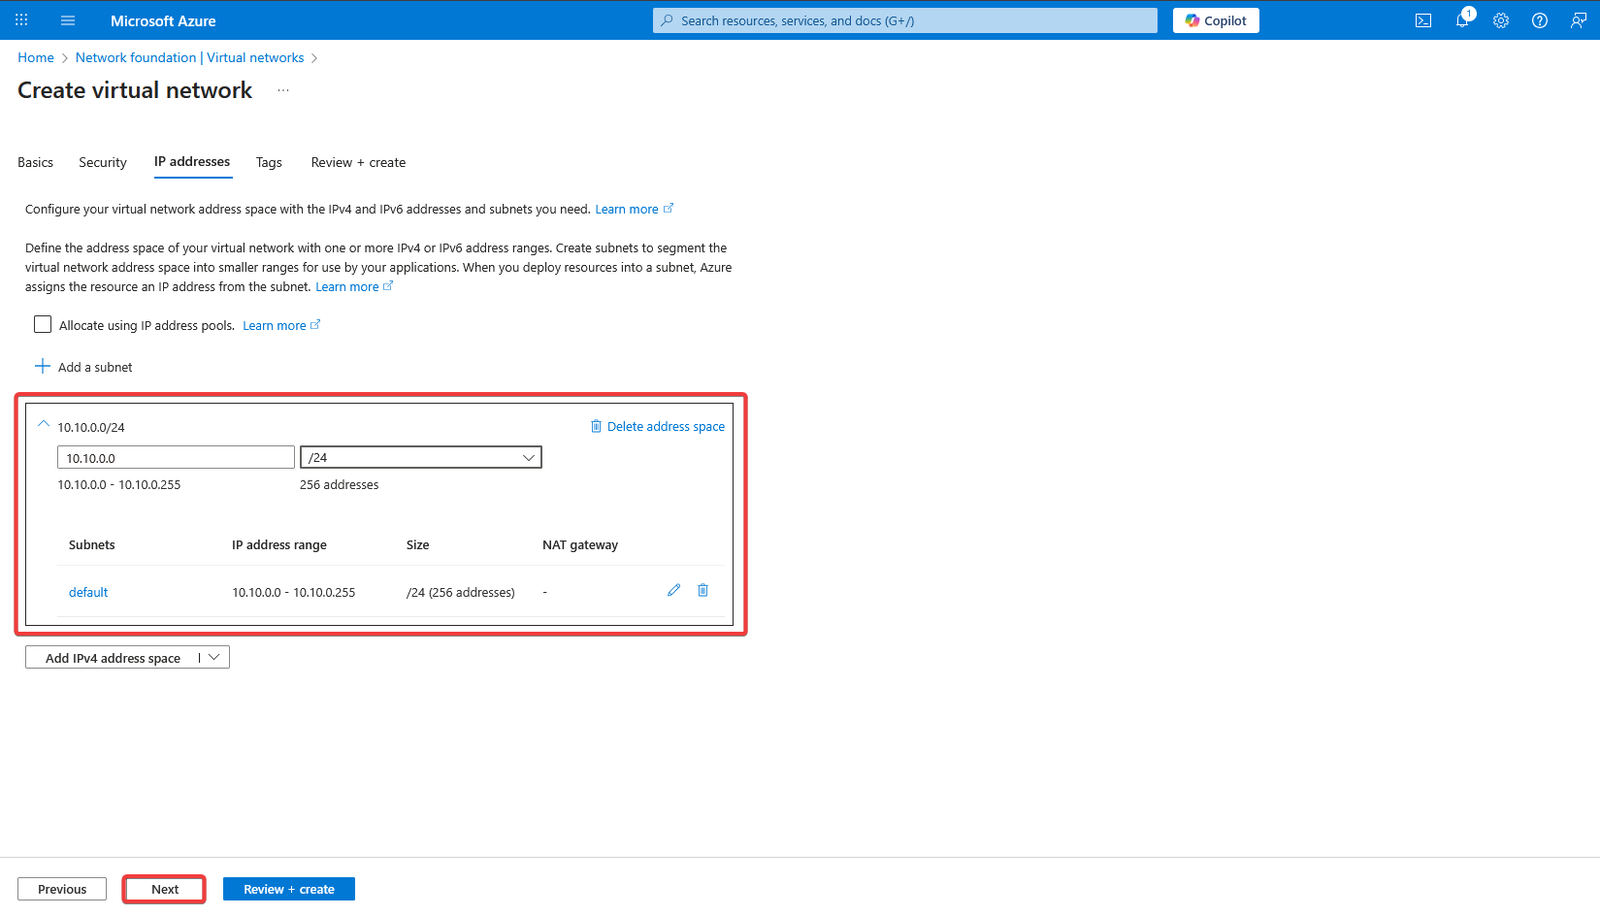
- Apply Tags.
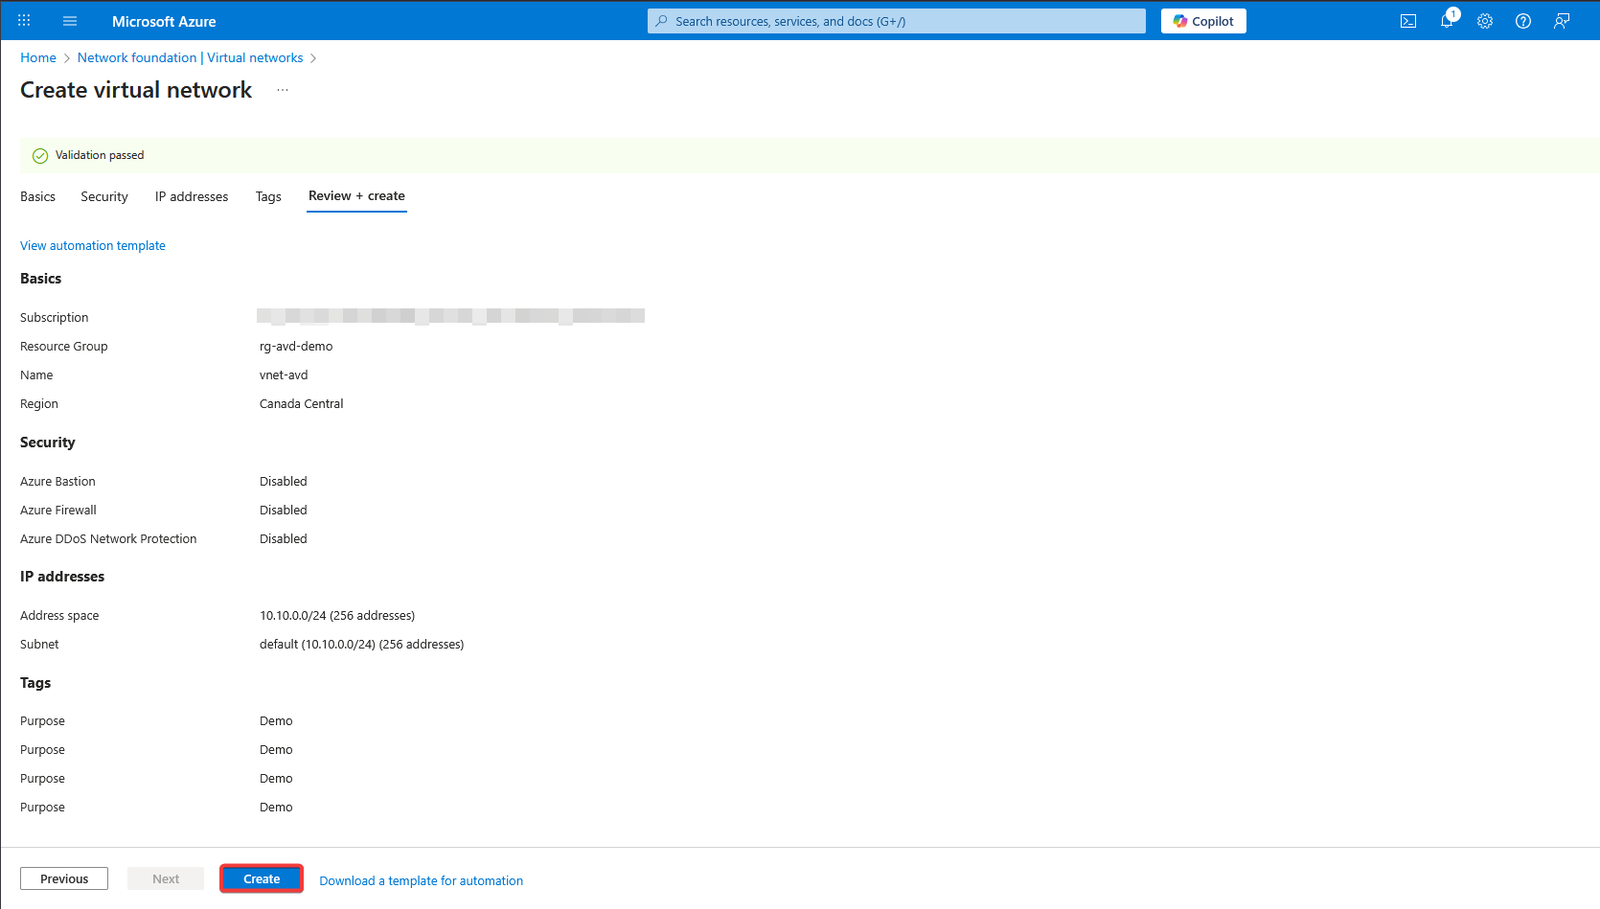
- Review and Create.
- Set Up Identity Integration
- For Hybrid environments, synchronize on-prem AD with Entra ID using Microsoft Entra Connect.
- For Cloud-only, ensure Entra ID is properly configured.
Step 3: Deployment
Login to the Azure Portal
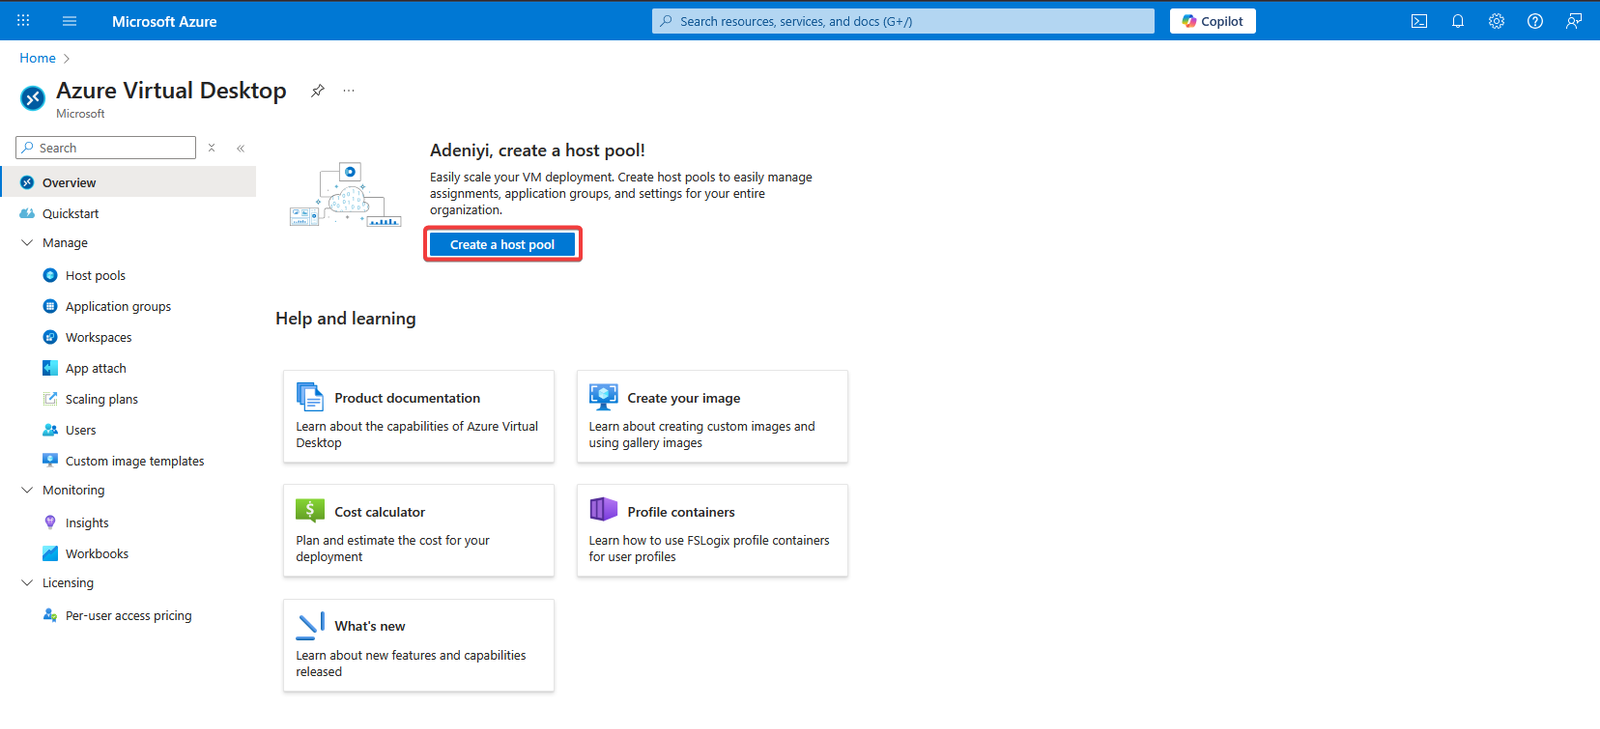
Search for Azure Virtual Desktop in the search bar at the top.
- Click on Create host pool.
Basics tab
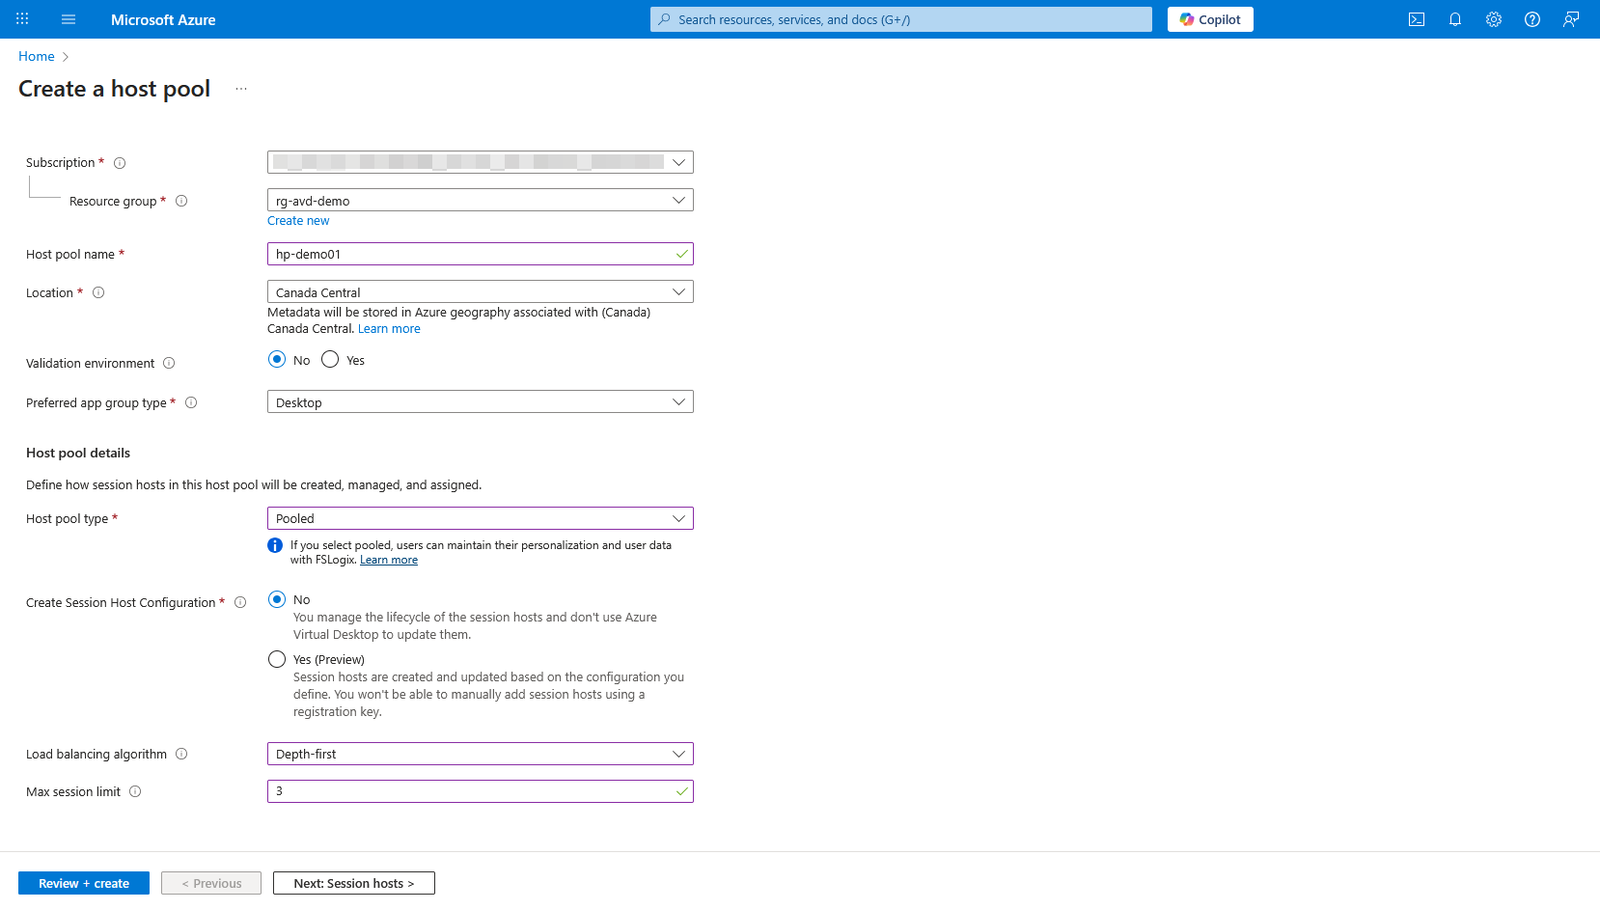
Under the Basics tab do the following:
- Select the Subscription where you want the Host pool created.
- Select the Resource group you created earlier. If you don’t have a resource group created yet, click on Create New.
- Give the Host pool a name.
- Select the Location (Azure Region) you want to deploy into.
- Leave the Validation environment radio button on No.
- For the Preferred app group type, you have two options. Desktop will provide users with a full desktop, while a RemoteApp is just an application in Azure that you can publish to users. For this tutorial, we’re going to select Desktop.
- For Host pool type there are two options. Pooled (this means multiple users can log into the AVD and share the resources) and Personal (this is dedicated to one user – this means one person will have the AVD resources to themselves). For this tutorial, we’re going to select Pooled.
- Leave the Create Session Host Configuration radio button on No.
- For the Load balancing algorithm, you can choose between Breadth-first and Depth-first. The difference here is that breadth-first will spread users out across all of your hosts, so if you’ve got four users logging onto four hosts, it will put one user on each host. Depth-first will fill the hosts up one at a time and so it would put all four users on the same host and keep doing so until that host is full, before moving on to the next one. For the purposes of this tutorial, we’ll go with Depth-first.
- Max session limit: We’ll set this to 3, which means that each of those hosts will be limited to three users.
- Click Next to go to the Session hosts tab where you’ll be prompted to add a virtual machine.
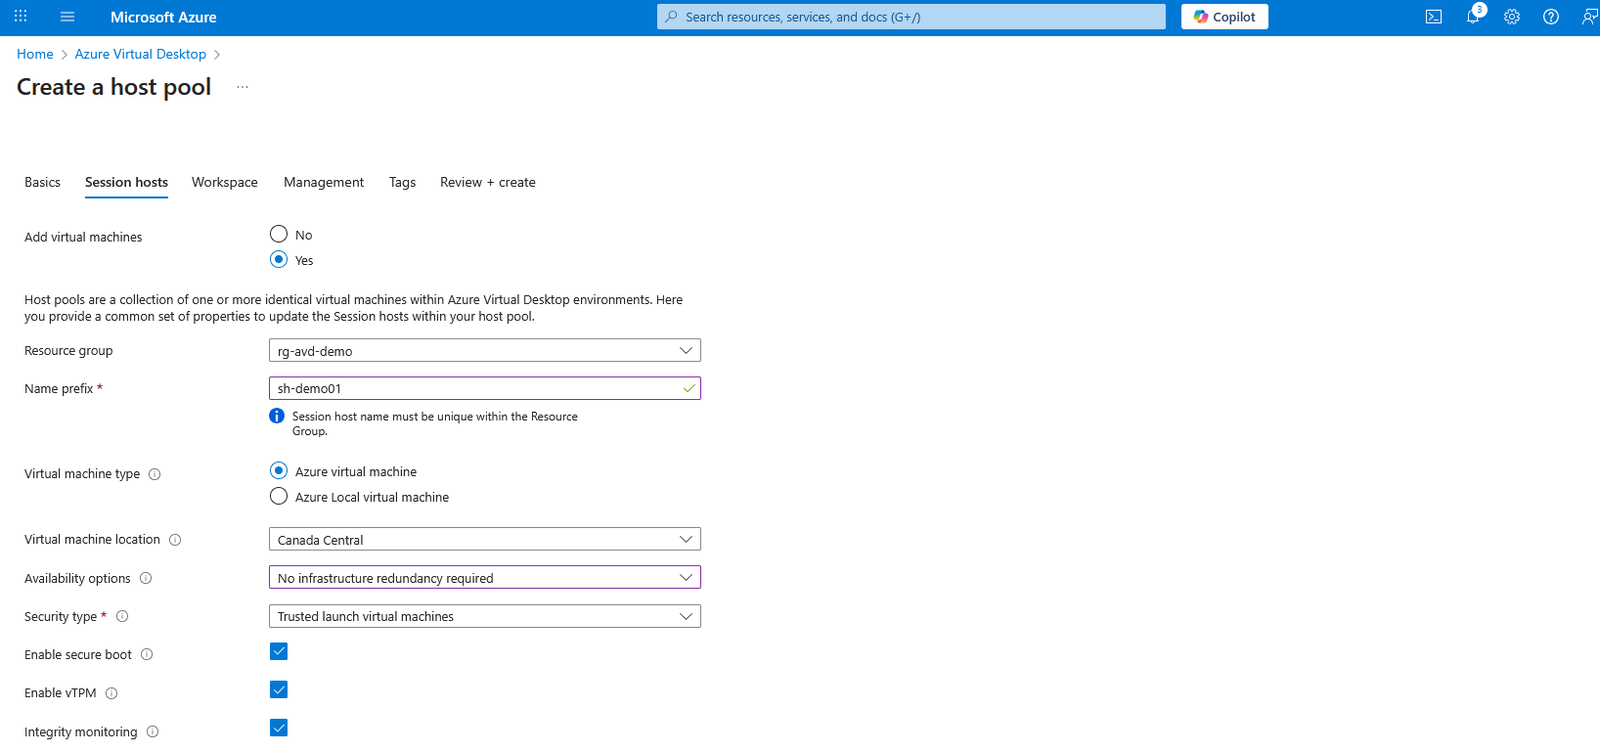
Session hosts tab
- Add virtual machines: Click the radio button to select Yes. This will pop up more options for you to work through.
- Resource group: Select the Resource group you created earlier.
- Name prefix: Provide a name prefix. This will be the prefix for your VMs.
- Virtual machine type: Leave it as Azure virtual machine.
- Virtual machine location: Select the same Azure region you selected in the previous screen.
- Availability options: There are three options – No infrastructure redundancy required, Availability zones and Availability set. Essentially, availability zones allow you to spread your infrastructure out over different regions so that if there’s a problem with a data centre in one region, you’ll still be able to access your virtual desktops. Bear in mind that selecting Availability zones and sets cost more money. For the purpose of this tutorial, we’ll select No infrastructure redundancy required.
- Security type: We’ll leave the Security type option set as Trusted launch virtual machines, which will also check the three boxes below it.
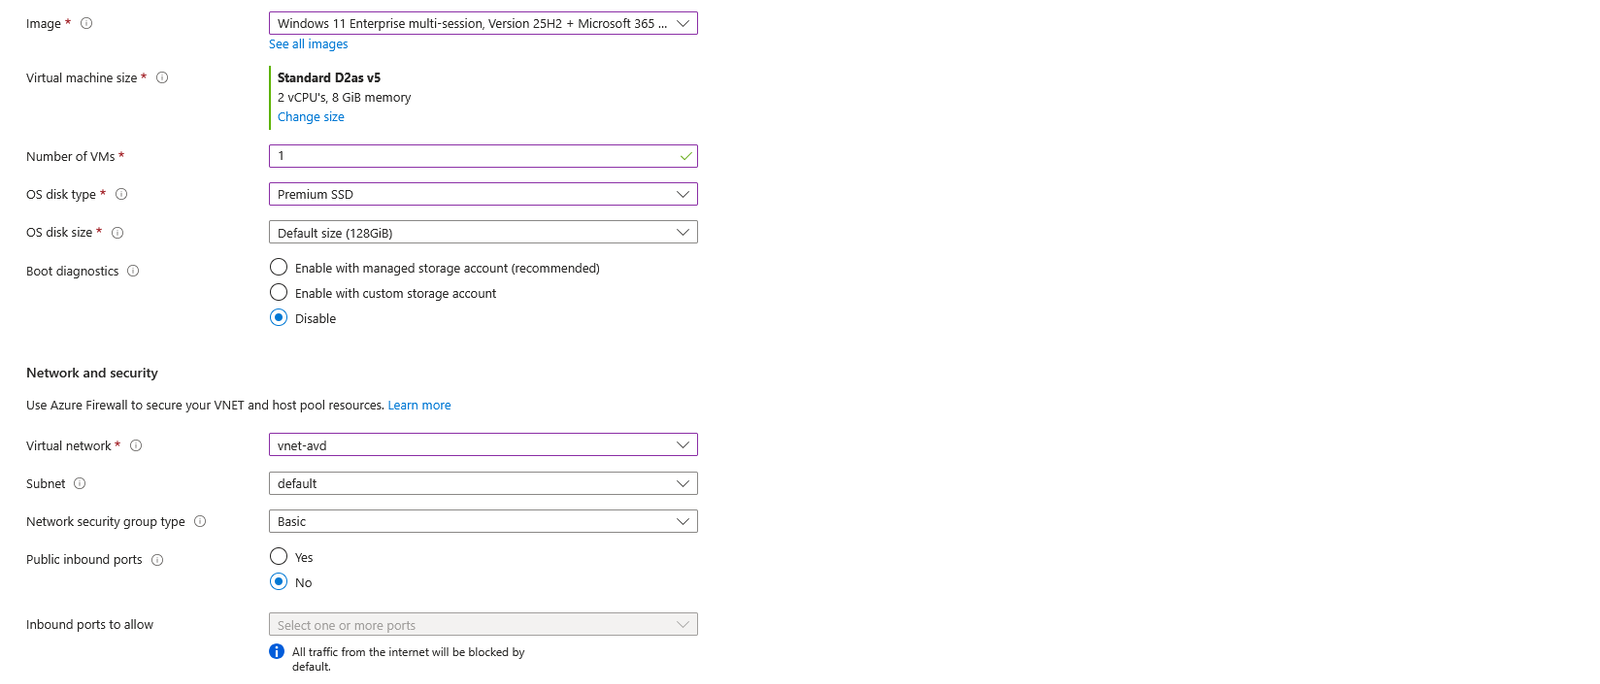
- Image:We’ll select the latest version (as of the time of this writing) of Windows 11 Enterprise multi-session, with Microsoft 365 apps bundled in.
- Virtual machine size: To select the VM size, click on Change size to select the VM size appropriate for your use case.
- Number of VMs: Specify the number of VMs you want created. We’ll set the number to 1 for this tutorial.
- OS disk type: We can choose from either a Premium SSD, Standard SSD or a Standard HDD, and I’d suggest spending the extra cash it takes to get the Premium SSD because it will provide a higher level of performance.
- OS disk size: Select the appropriate disk size based on your requirement. We’ll select the Default size for this tutorial.
- Boot diagnostics: We’ll disable boot diagnostics for now and move to the Network and security tab
Network and security
- Virtual network: Select the network you created earlier in point 3 under step 2 above. Leave the Subnet as default.
- Network security group type: Leave the Network security group type as Basic.
- Public inbound ports: Select No.
Domain to join
- Select which directory you would like to join: We can choose whether we want to join the virtual machine to an Active Directory domain (this will require connectivity to your on-premise Active Directory domain) or whether we want to make them part of Microsoft Entra ID. For this tutorial, we’d select Microsoft Entra ID.
- Enroll VM with Intune: Select No. We won’t be enrolling the VM with Intune in this tutorial.
Virtual machine administrator account
- User name: Create a username for your admin user. This will be the local admin account
- Password: Create a password for the local admin account (make sure you keep the login information)
- Click Next to go to the Workspace tab.

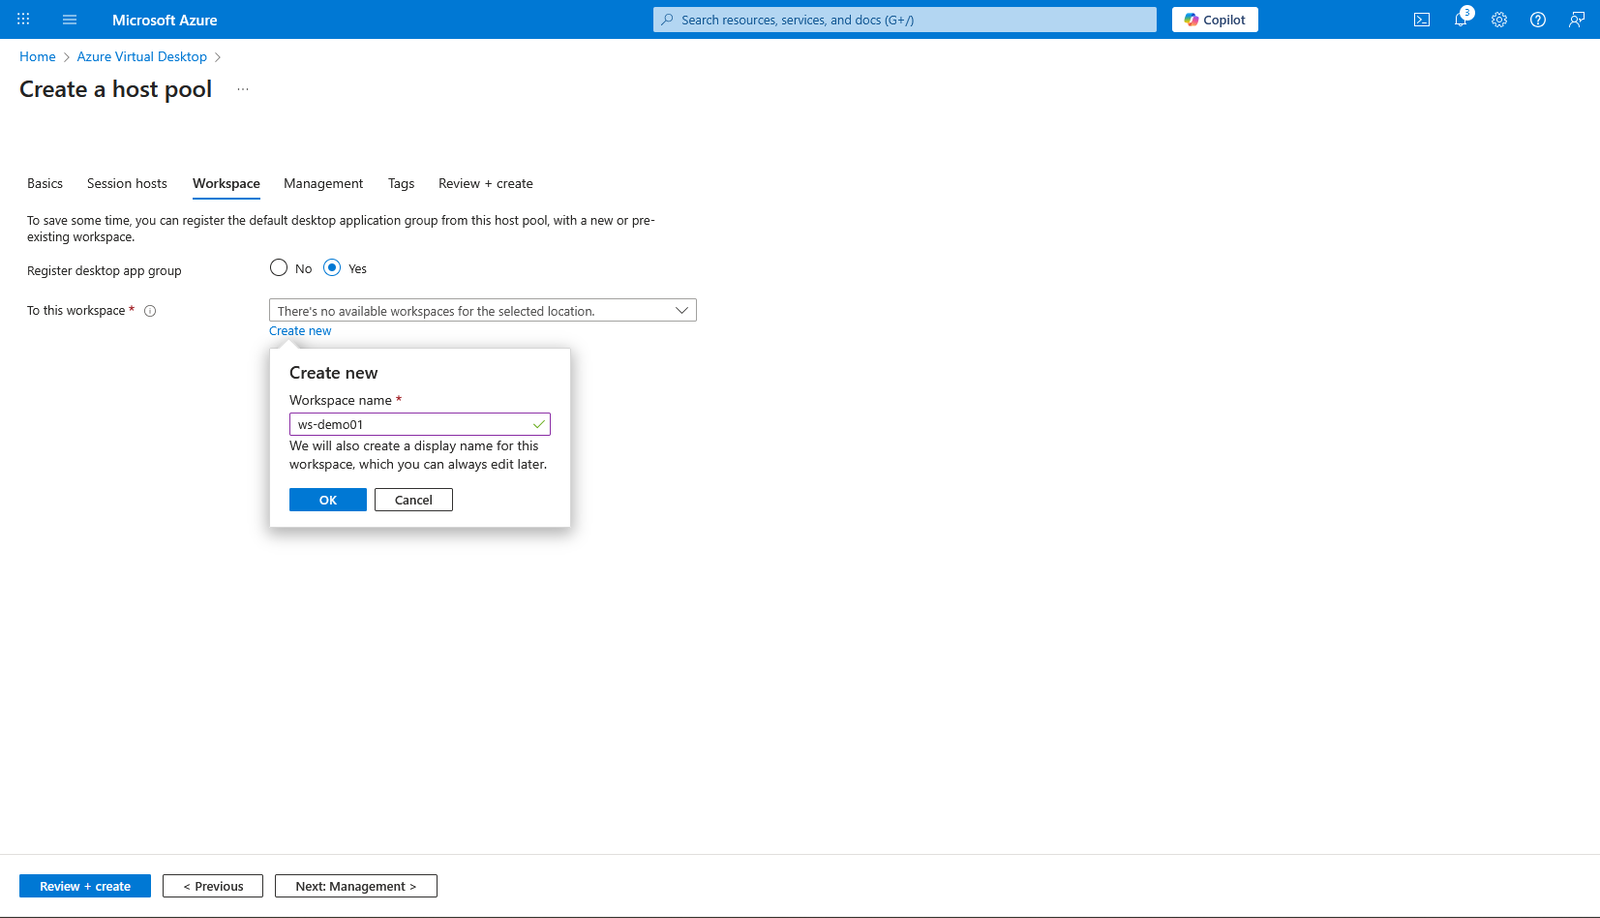
Create a Workspace
You can create a Workspace now or later from the host pool. In this tutorial, we’ll create a Workspace now.
- Register desktop app group: Select Yes.
- To this workspace: Select Create new to create a new Workspace
- A Create new dialog box will pop up. Give the Workspace a name and click OK.
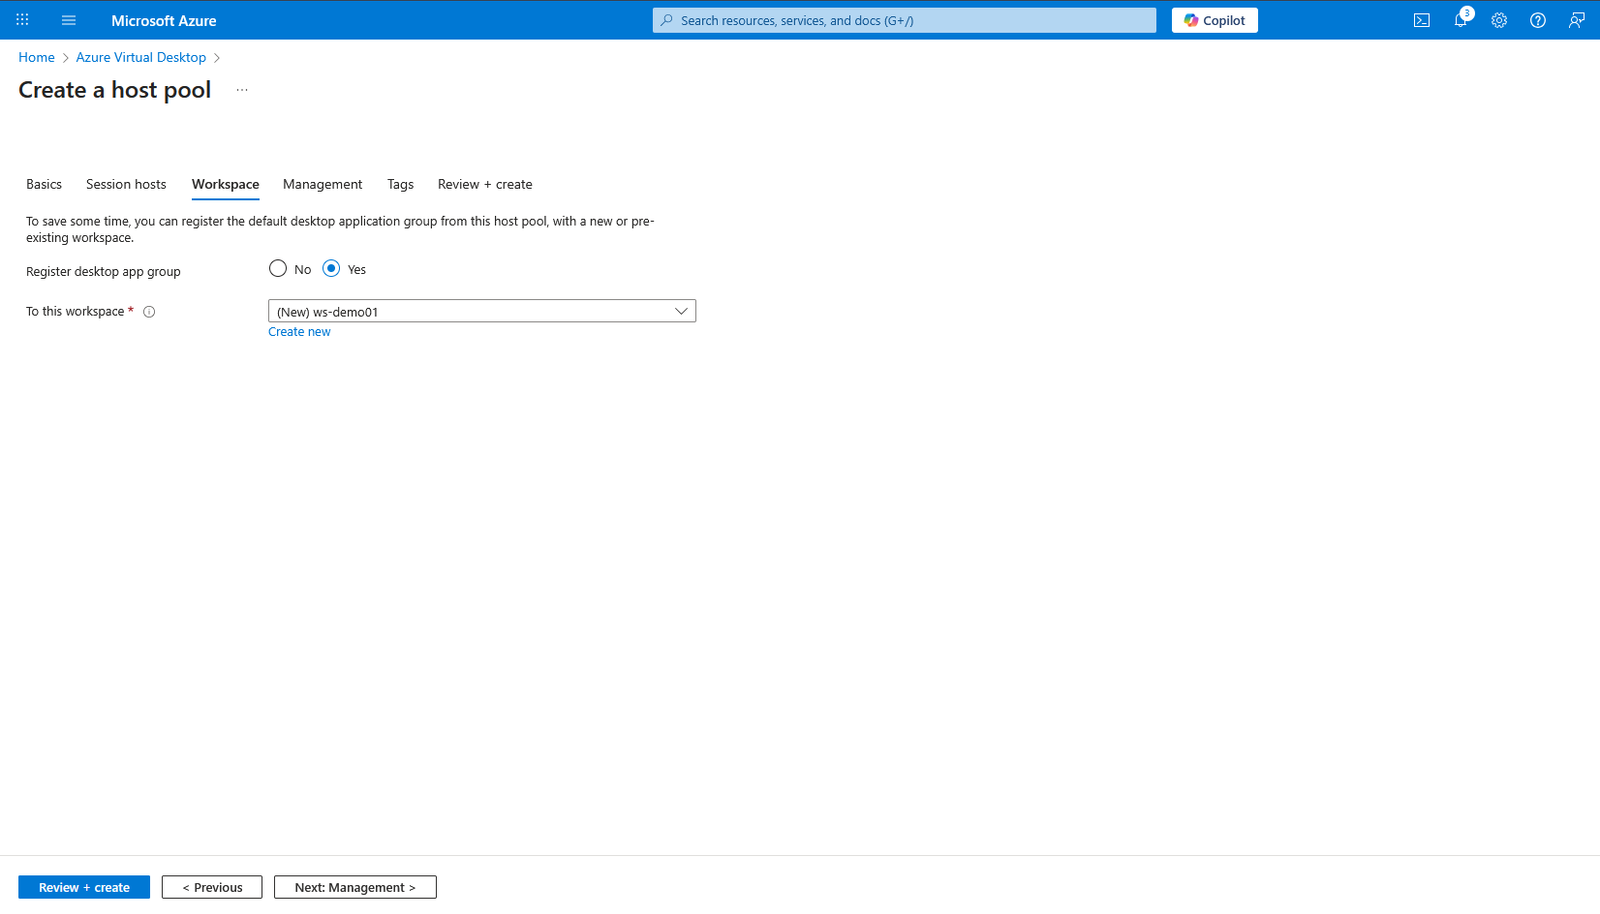
- Click Next to go to the Management tab.
- Leave the default settings
- Click Next to add tags
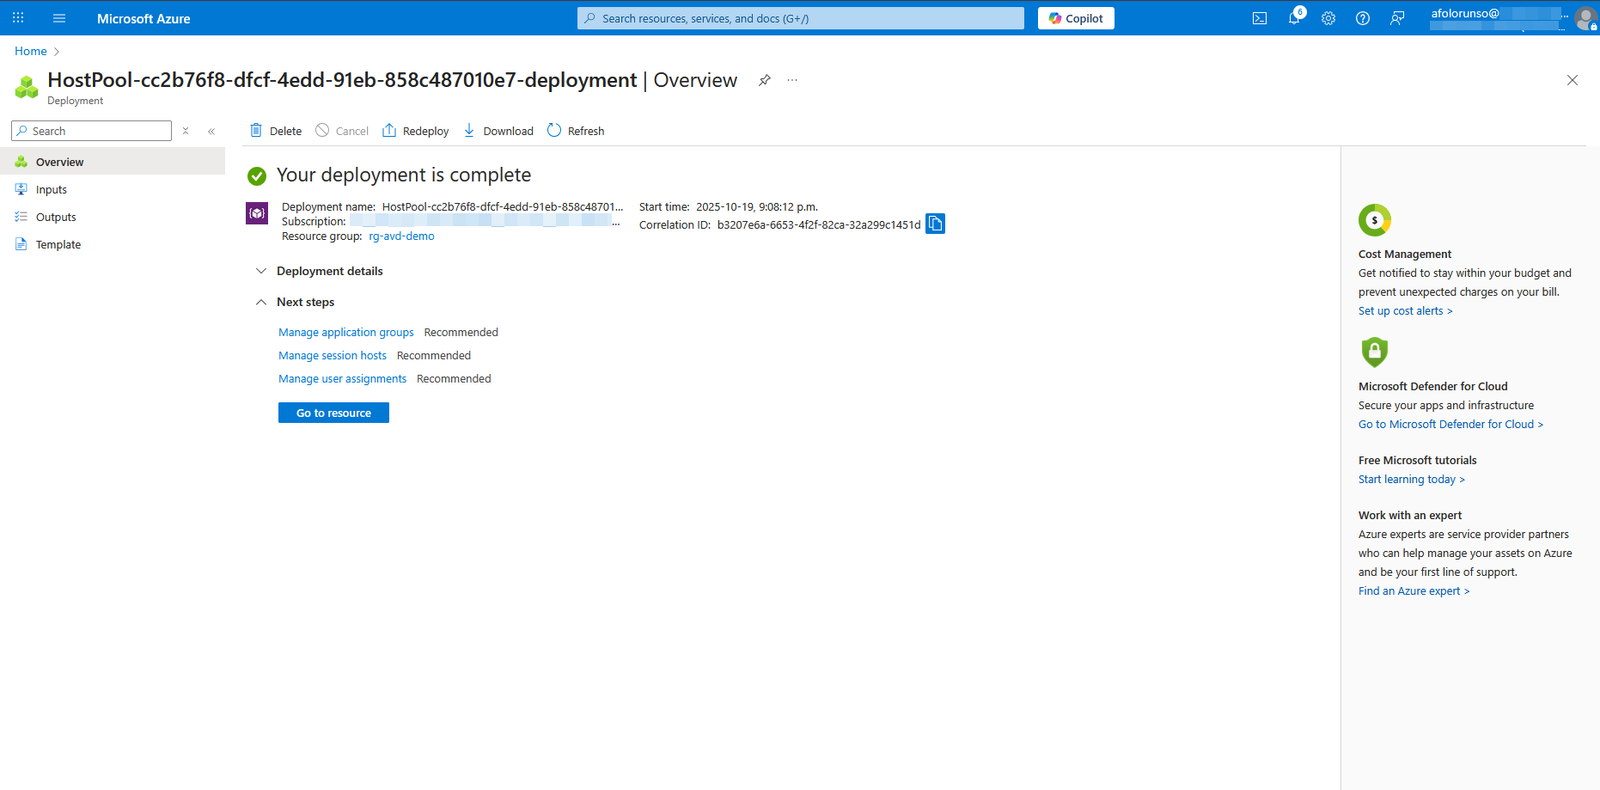
- Click Next to go to the Review + create tab
- Click Create.

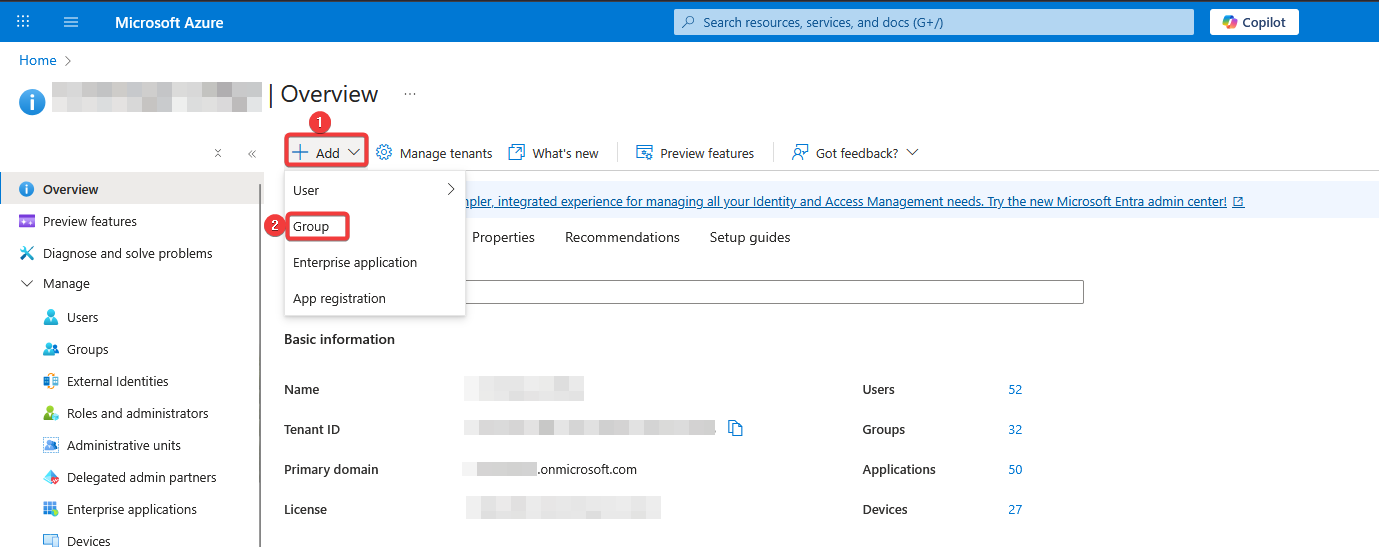
Create AVD Users and Admin groups and add users to the groups
- Go to Microsoft Entra ID
- Click on the drop down beside Add and Select Group
- Provide a Group name
- Provide a Group description (optional)
- Click on the link below Members and Add the members you want.
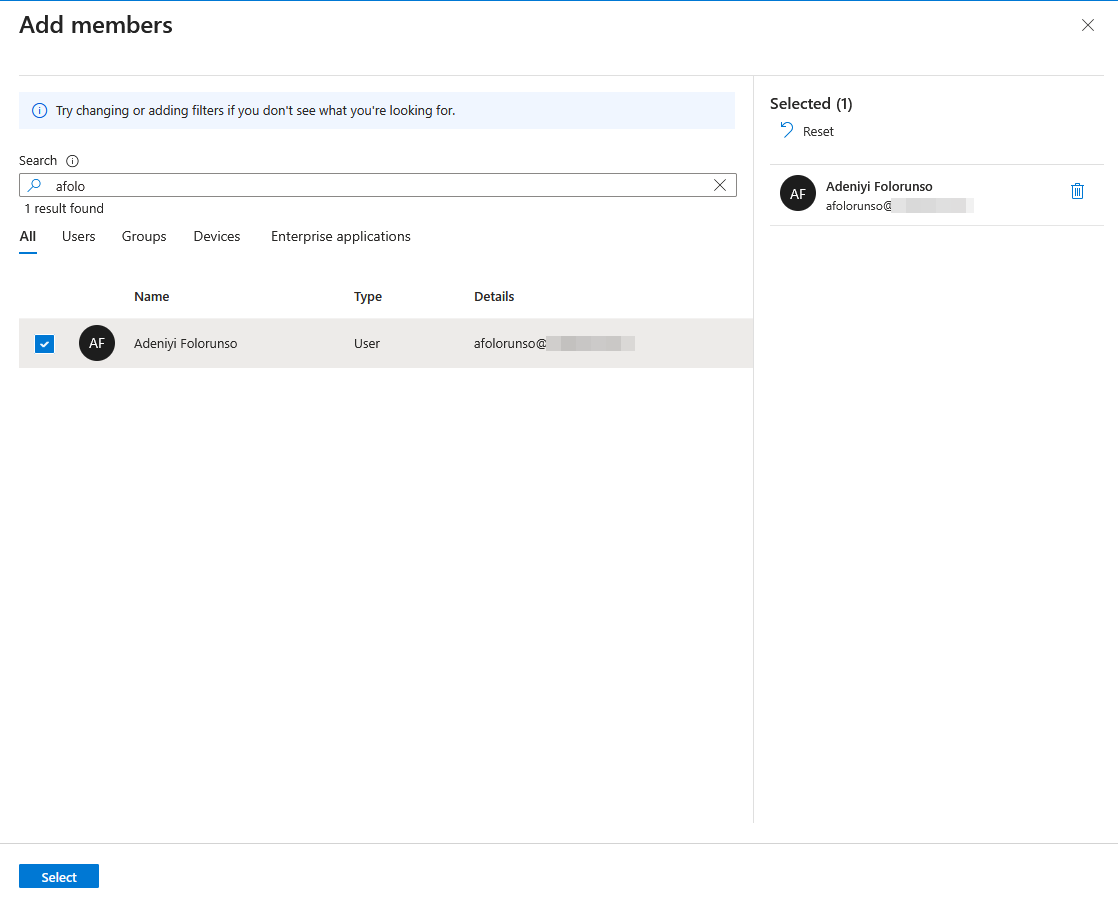
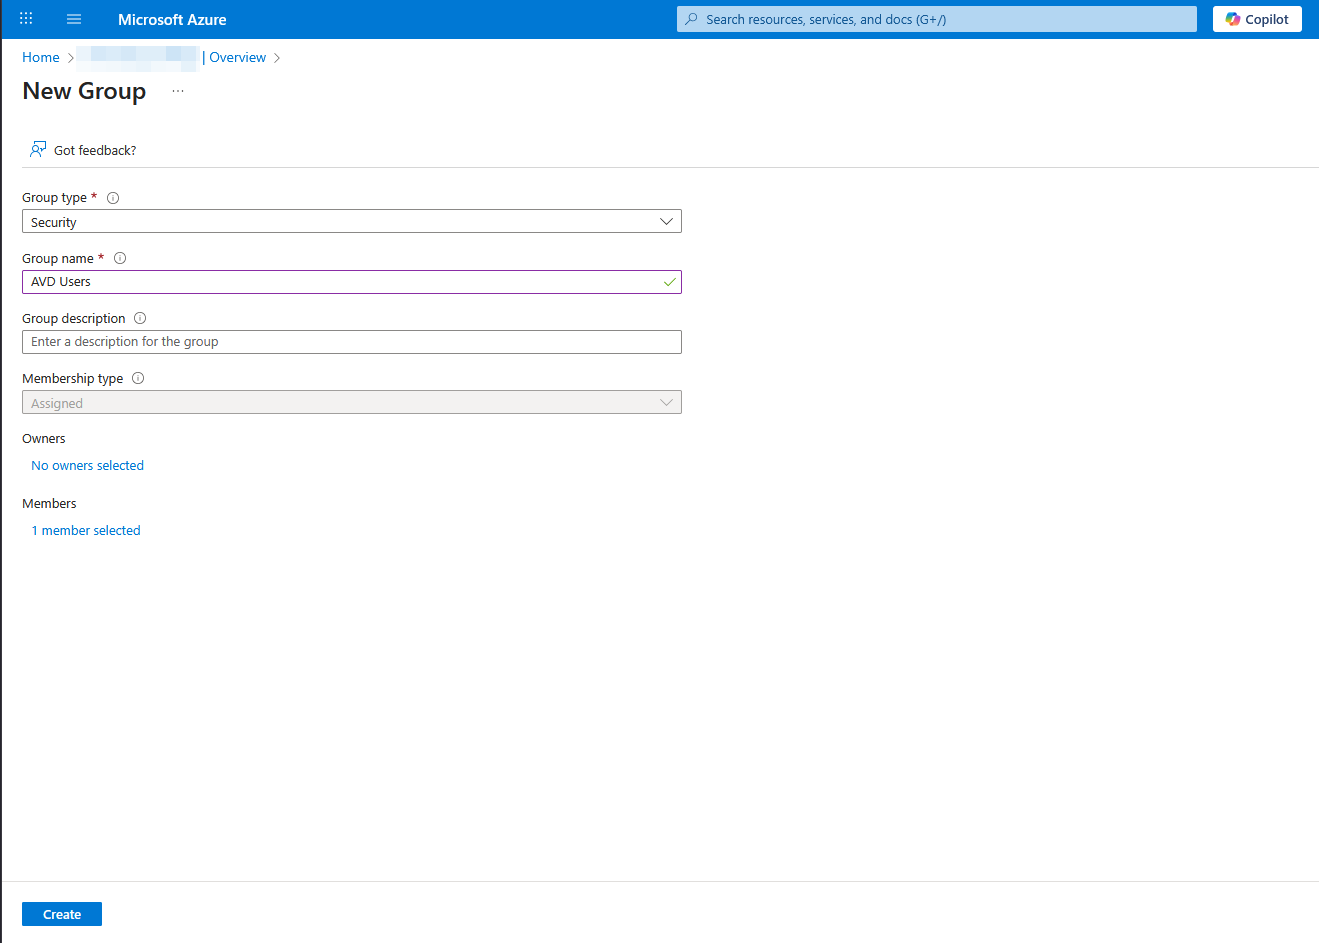
- Click on Create.
Follow the same steps to create AVD Admin group and add members to the group.
We created these two groups for the following reasons: AVD Admins will have admin access to the AVD sesson host and will be able to install applications and carry out other admin tasks. AVD users will just have standard access.
Assign Users to the Host Pool
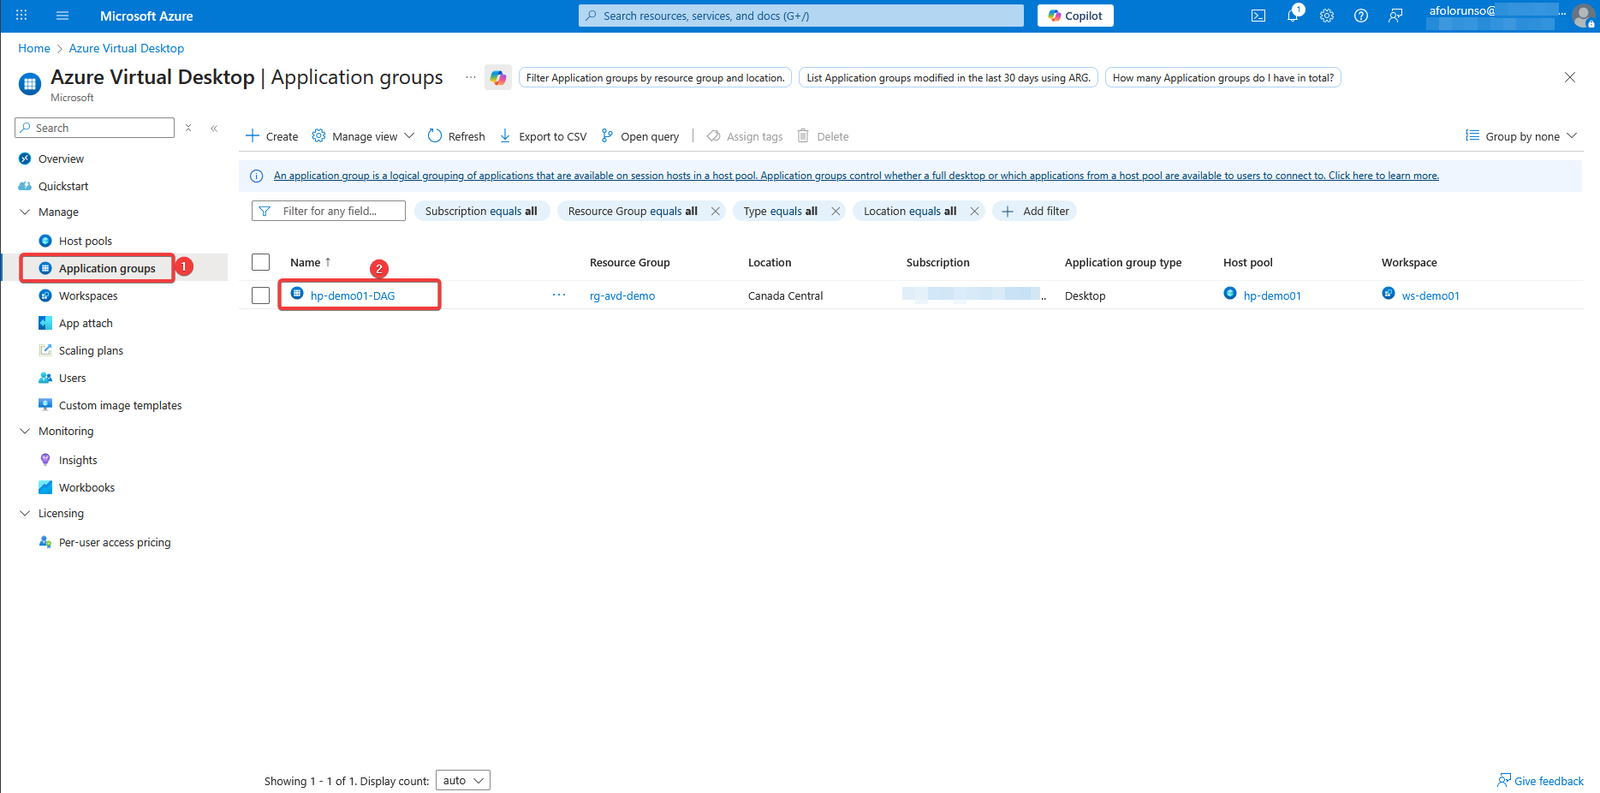
- Go back to the Azure Portal homepage and choose Azure Virtual Desktop.
- Next, select Application groups from the left navigation pane.
- Click on the Application Group that was created as part of the host pool creation (in our case it was hp-demo01-DAG). This will open another window where you can select Assignments from the second navigation pane.
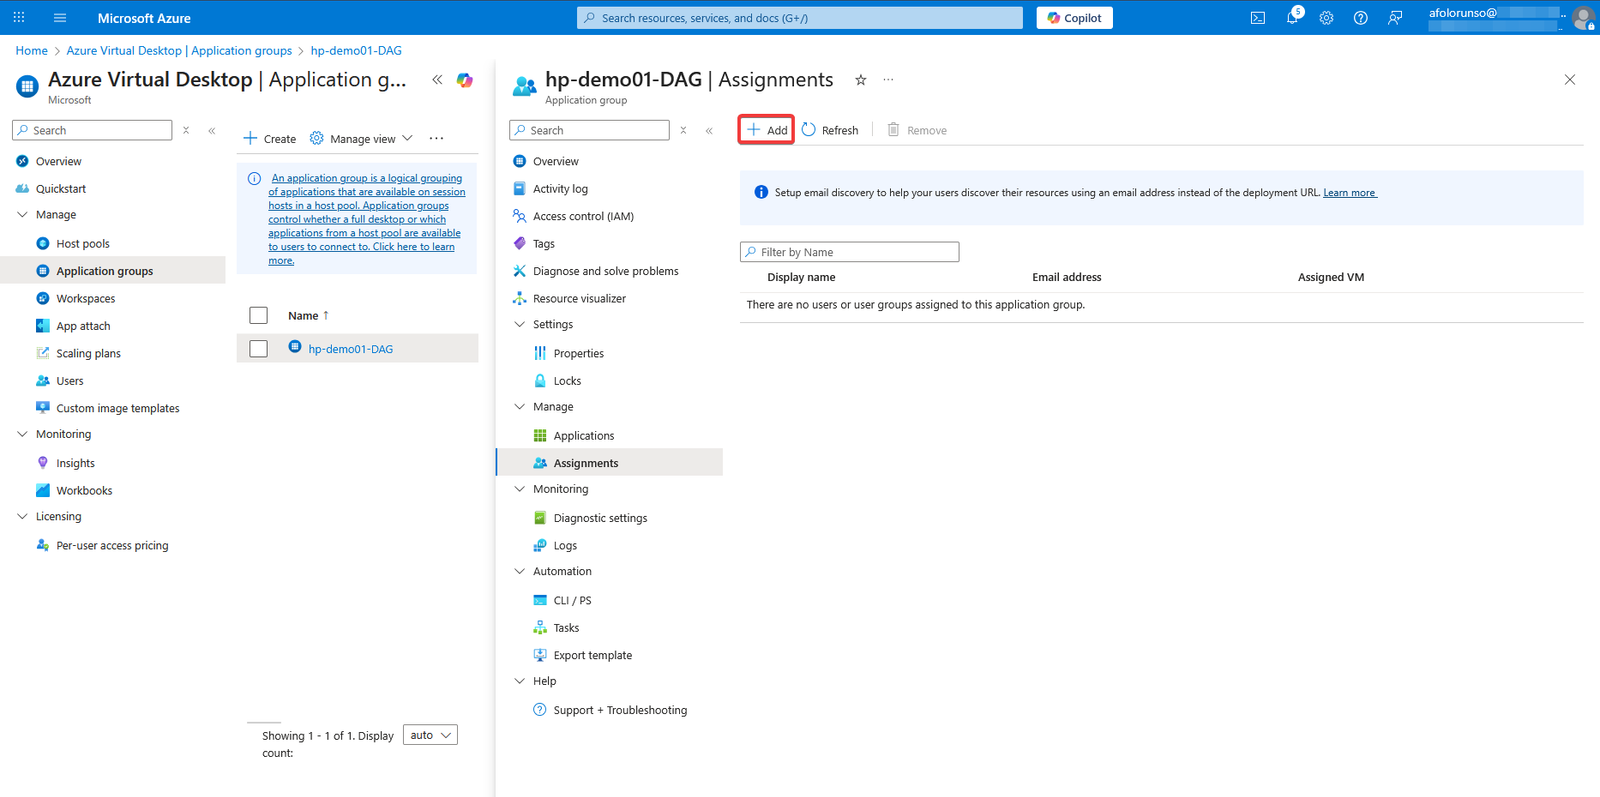
- Select Assignments under Manage.
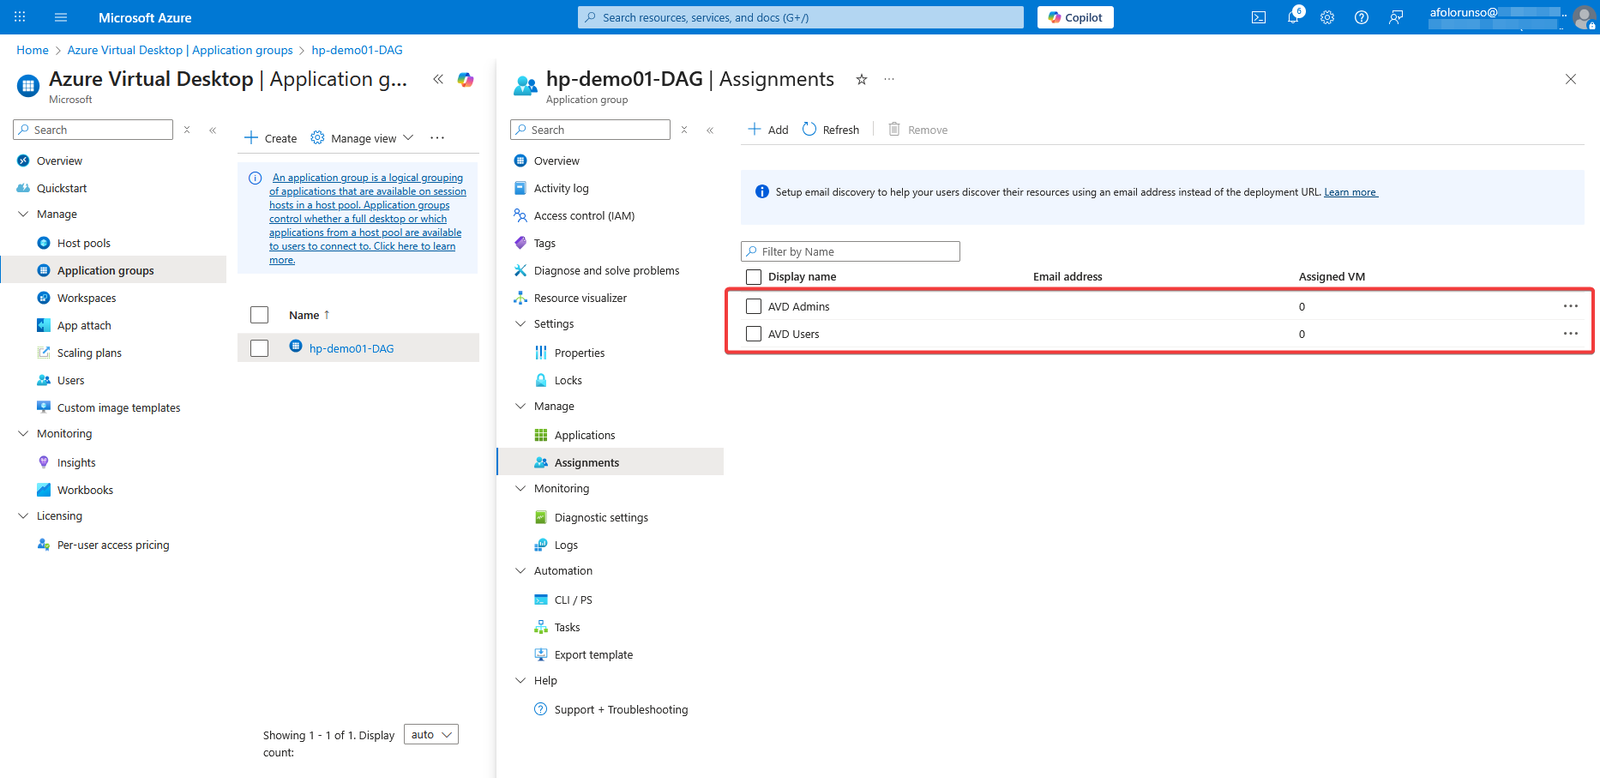
- Click Add and add the two AVD groups we created
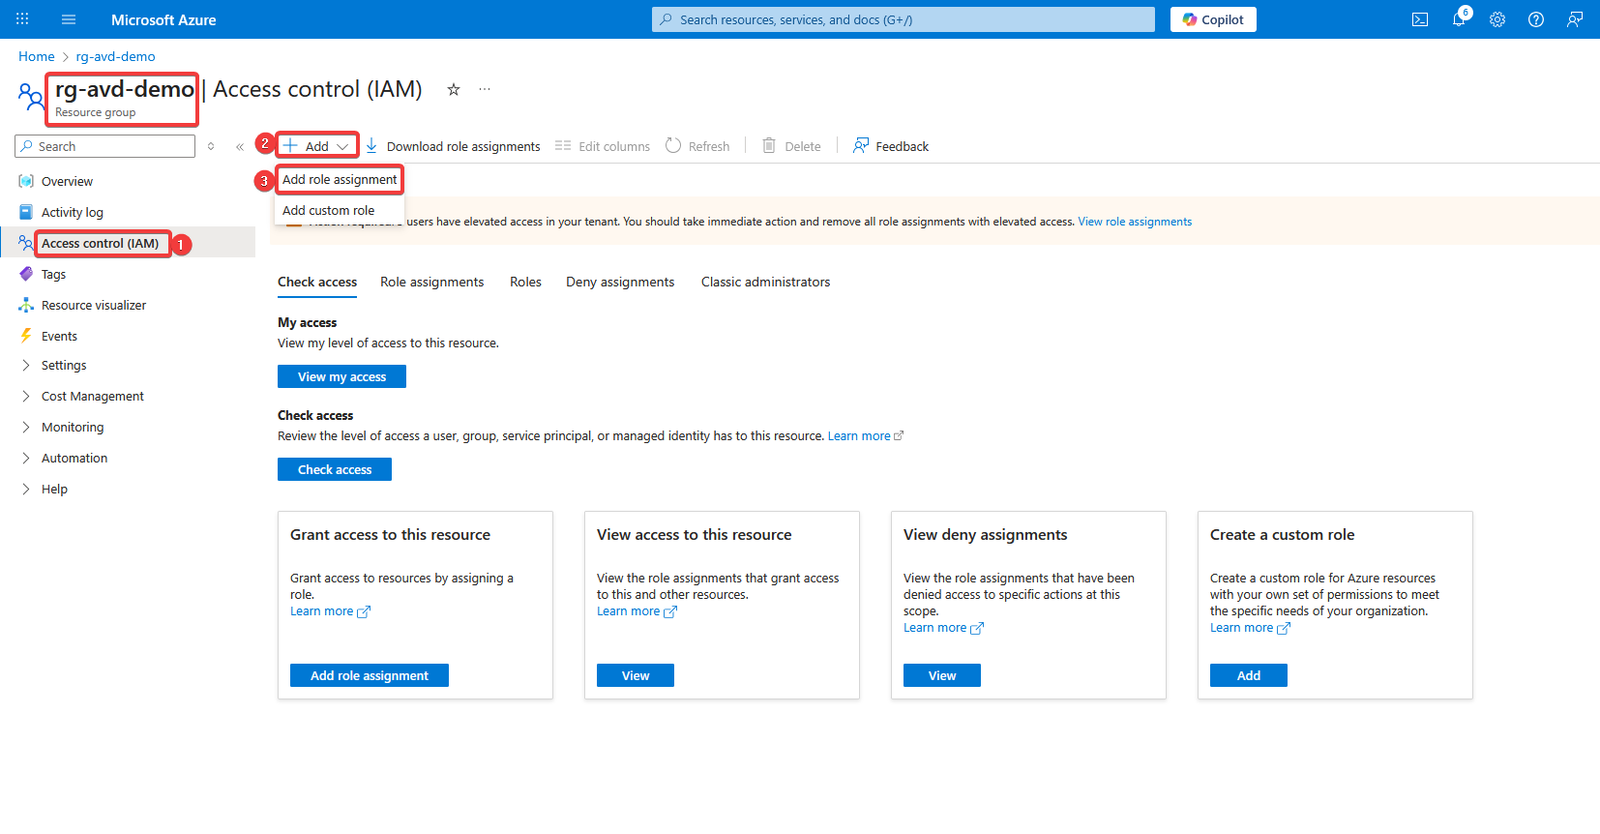
- Next, go back to the Azure Portal homepage and then select the resource group you created earlier for AVD (in our case it’s rg-avd-demo)
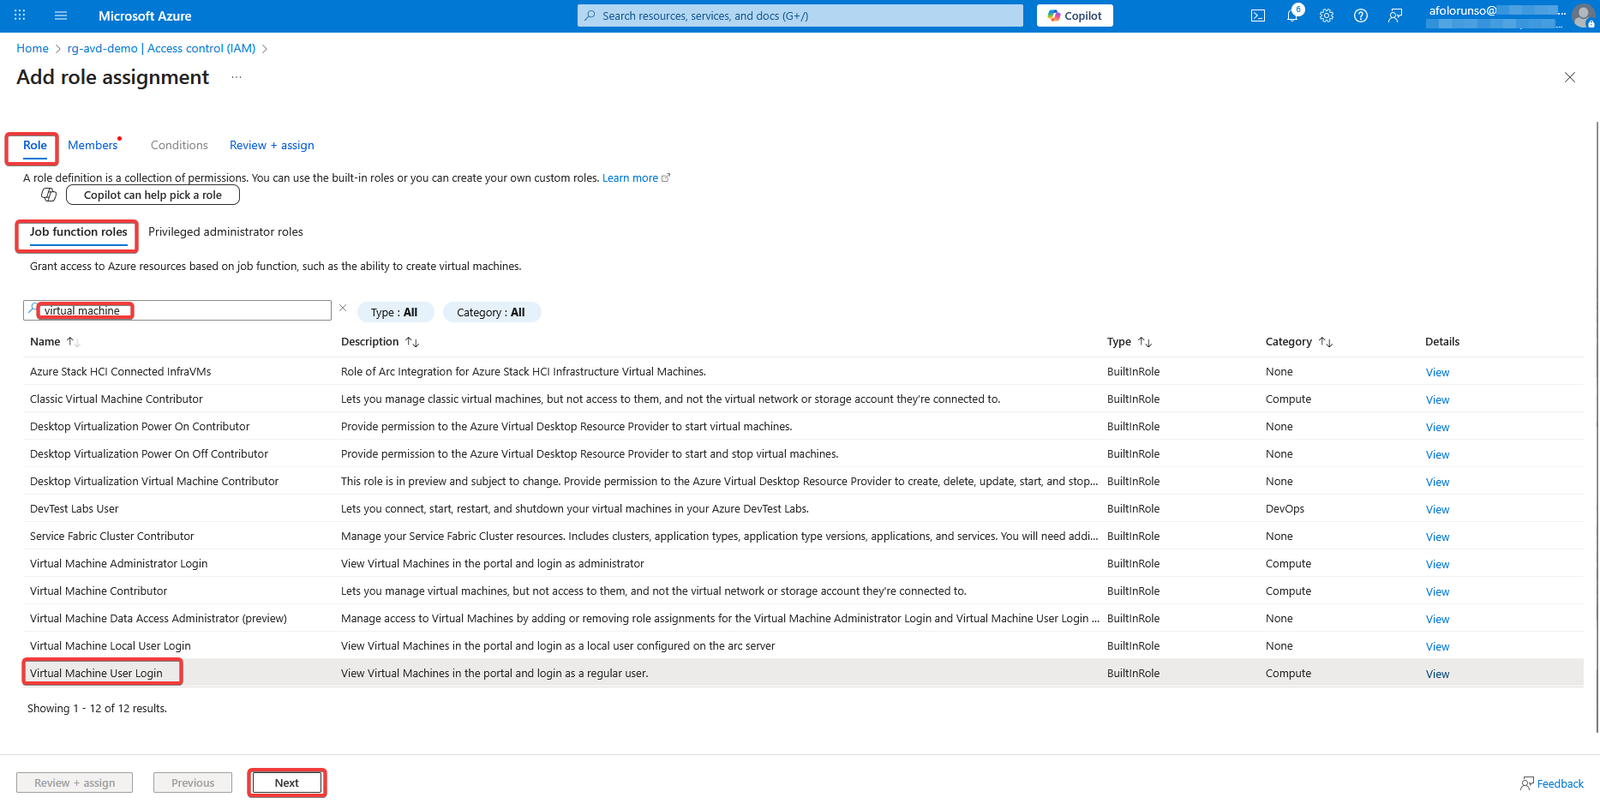
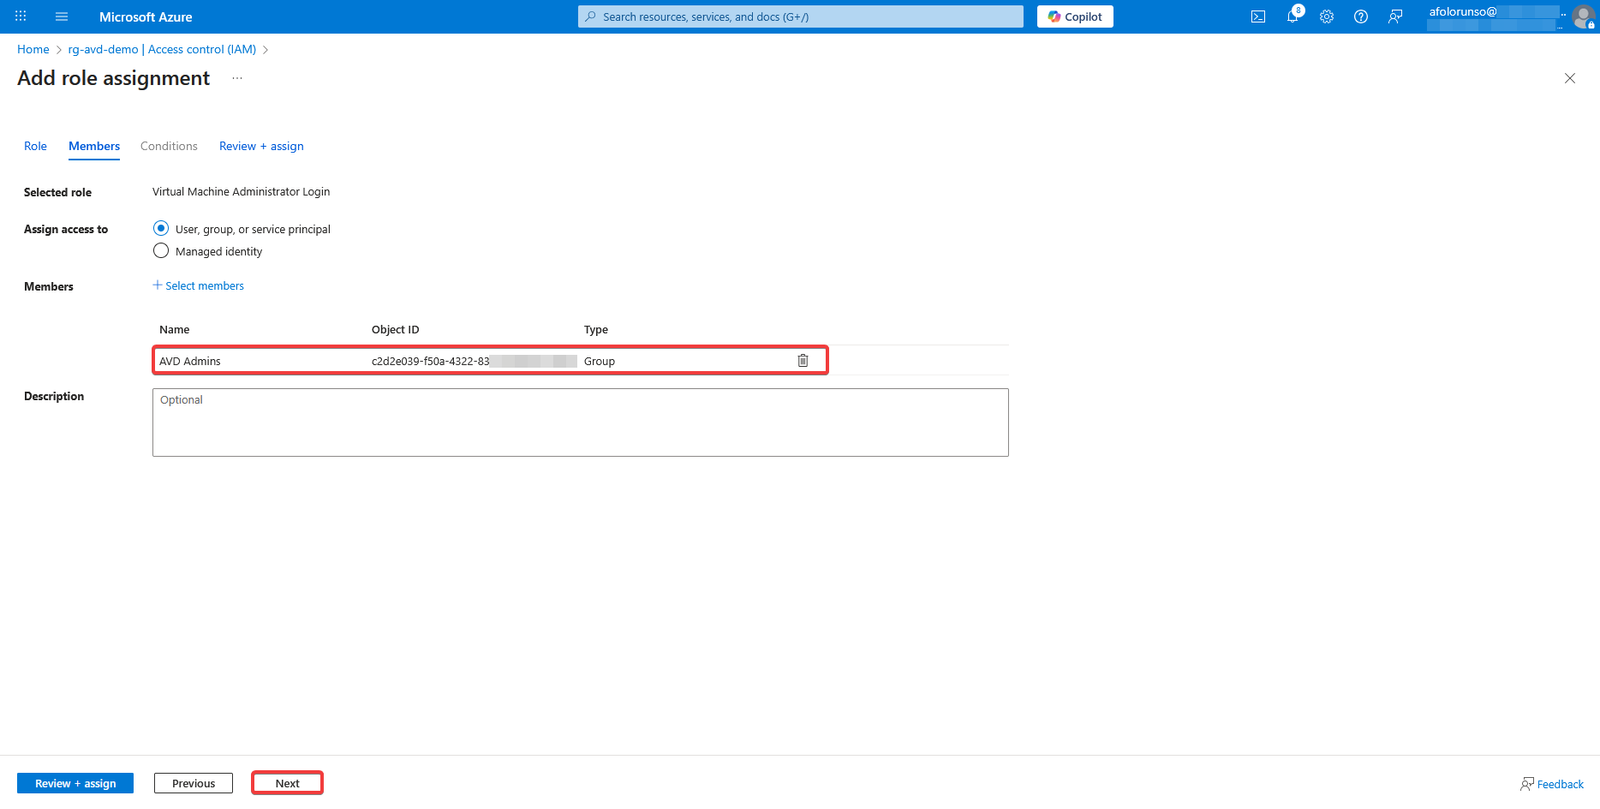
- Select Access control (IAM) from the left navigation menu, and click Add, then select Add role assignment.
- Under Role > Job function roles, type virtual machine in the search bar then select Virtual Machine User Login from the results and click Next.
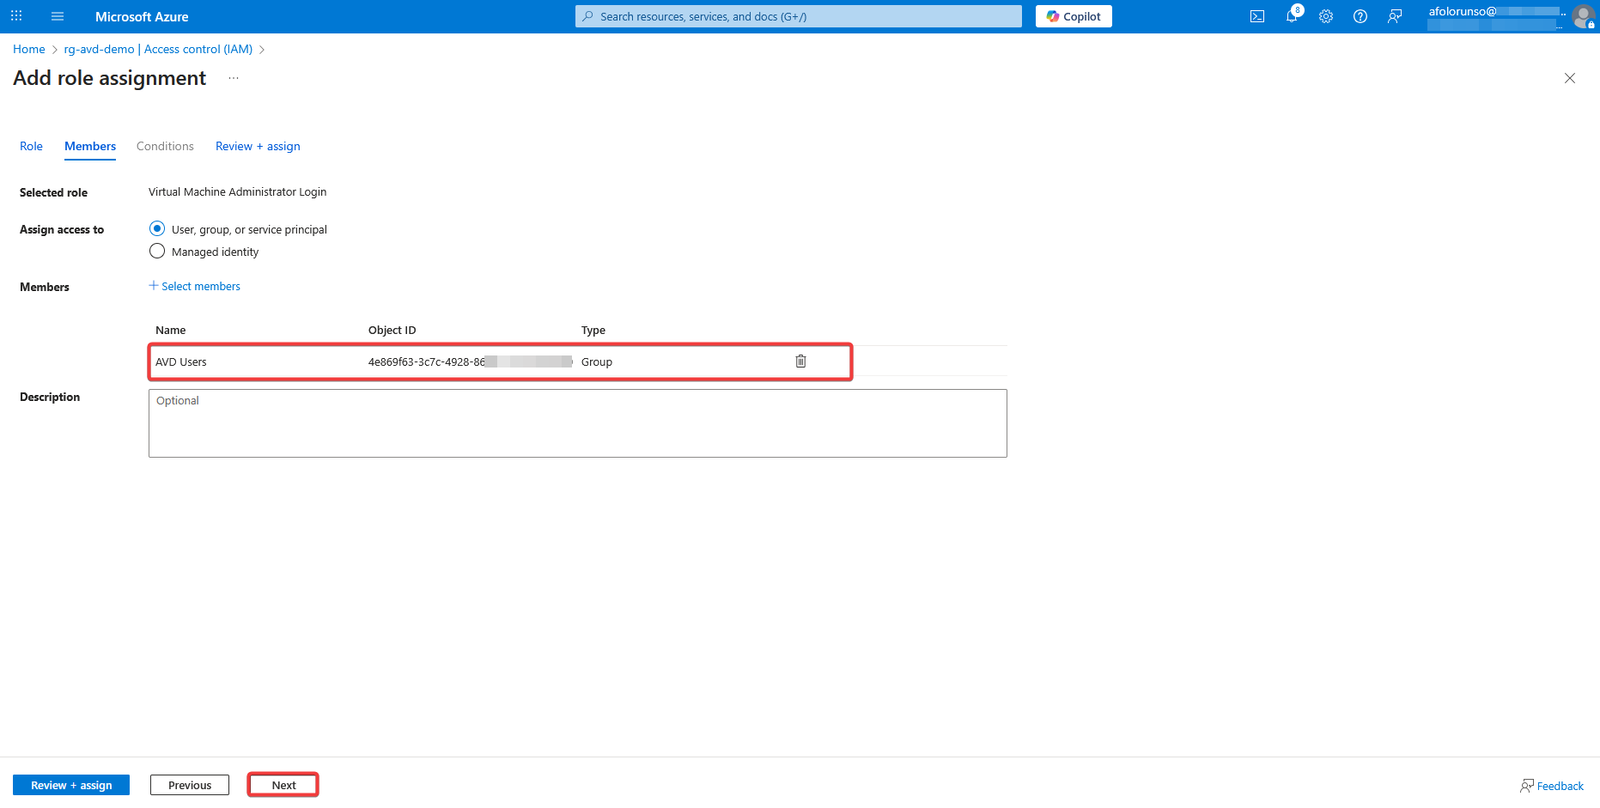
- Under the Members tab, select user, group, or service principal radio button, then click the blue Select members link and then Select the AVD users group and click on Select,
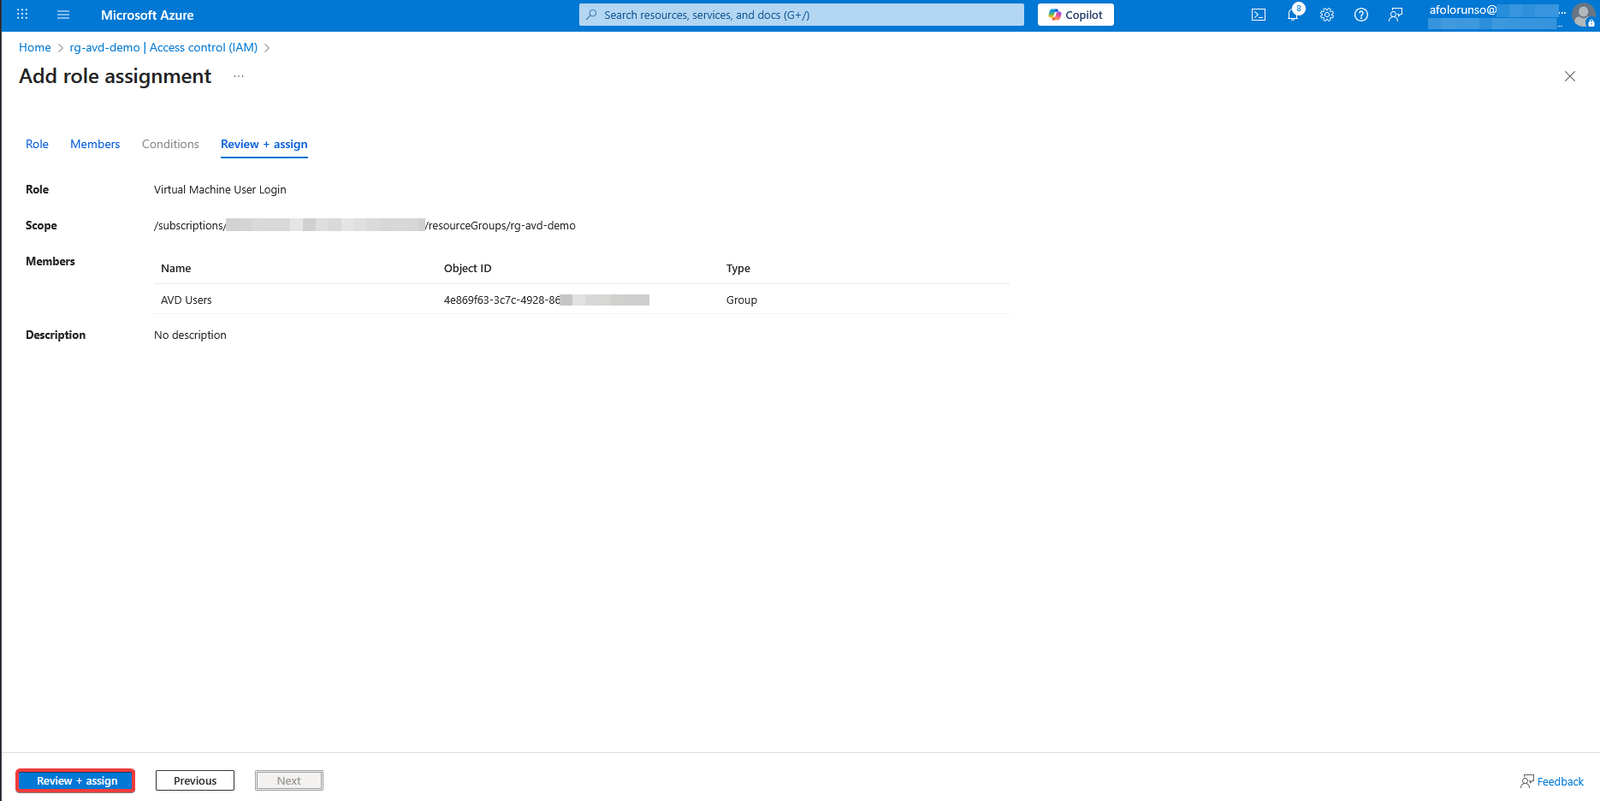
- Once the group has been selected, click on Next, then Review + assign.


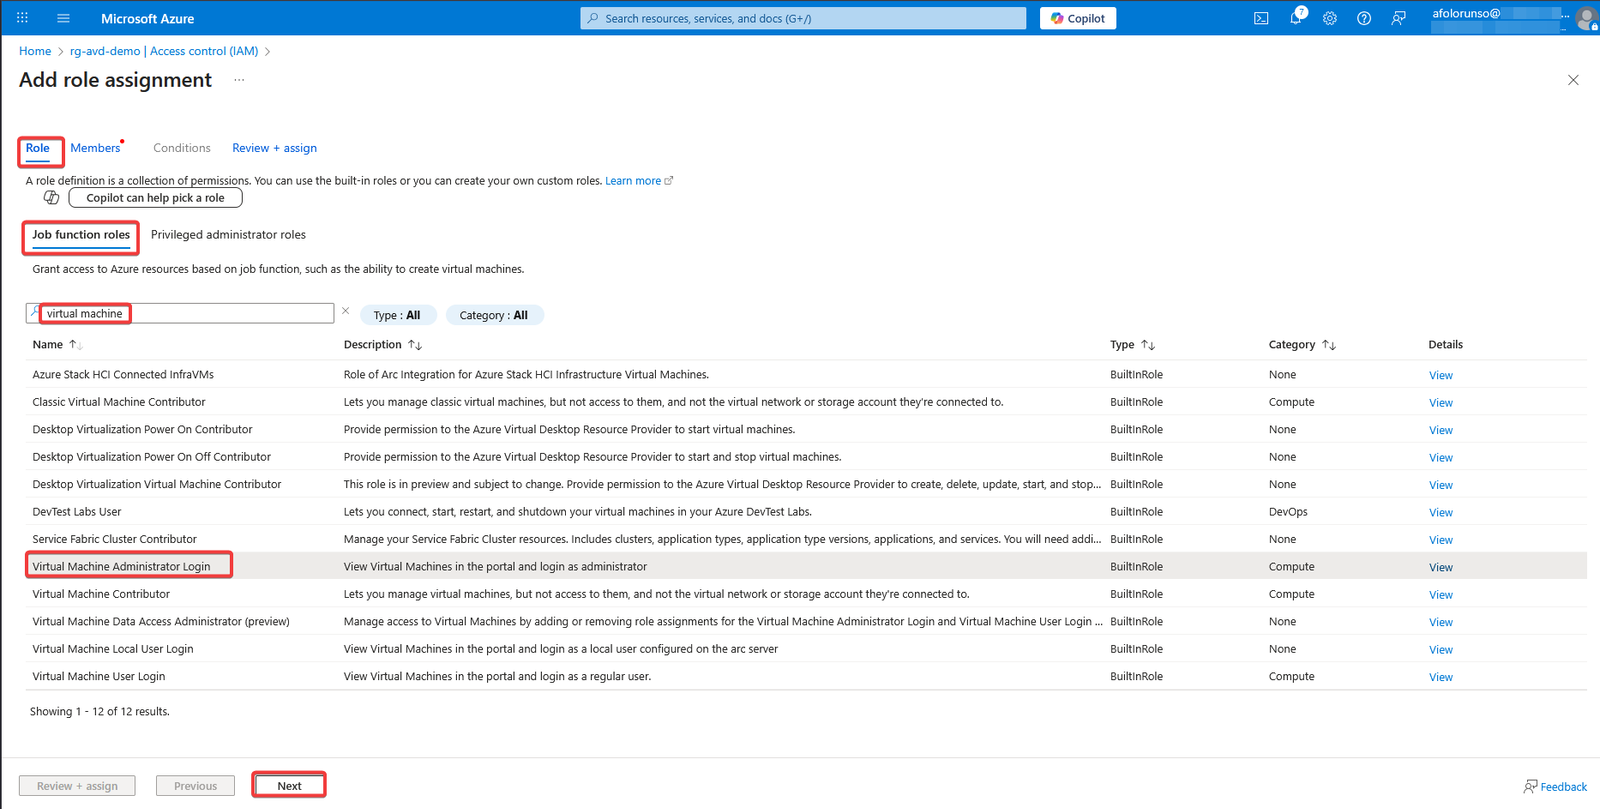
- We also need to add another role, this time for the admin side of things. Follow the same steps as before, but when you run the search, choose Virtual Machine Administrator Login. Continue the process and select your AVD admins group, and complete the process.


Set Up AVD to use Microsoft Entra Single Sign-On
- To allow your users to access your Azure virtual desktop using single sign-on. Go back to the Azure Portal homepage
- Select Azure Virtual Desktop.
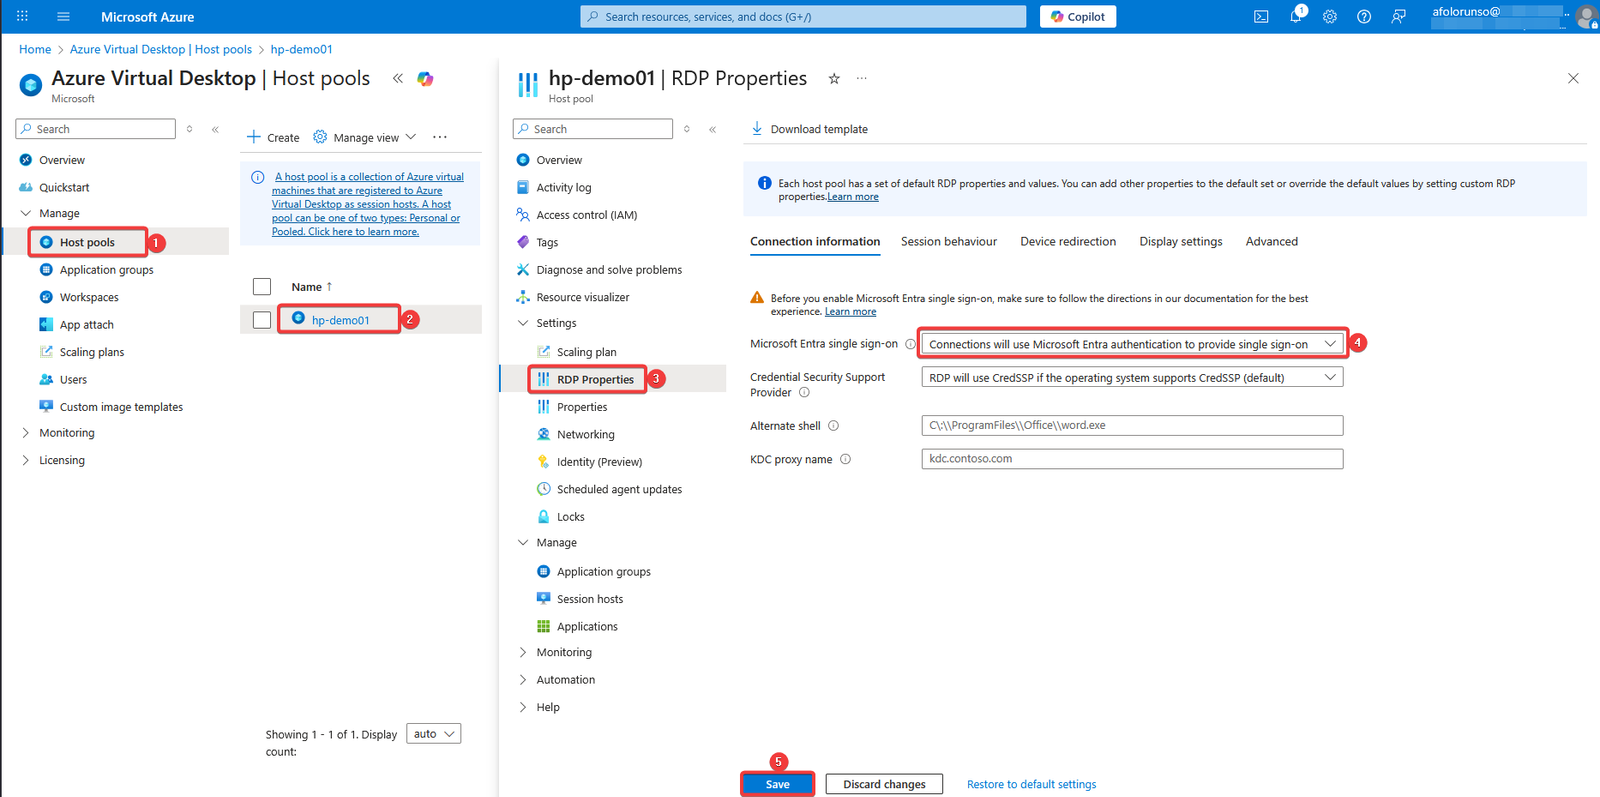
- Select Host pools in the left navigation pane under Manage, then select your host pool. Under the Settings menu, choose RDP Properties. This will load up the connection information screen.
- Next to the Microsoft Entra single sign-on menu, hit the drop-down menu and choose Connections will use Microsoft Entra authentication to provide single sign-on. Then click Save to save your settings.
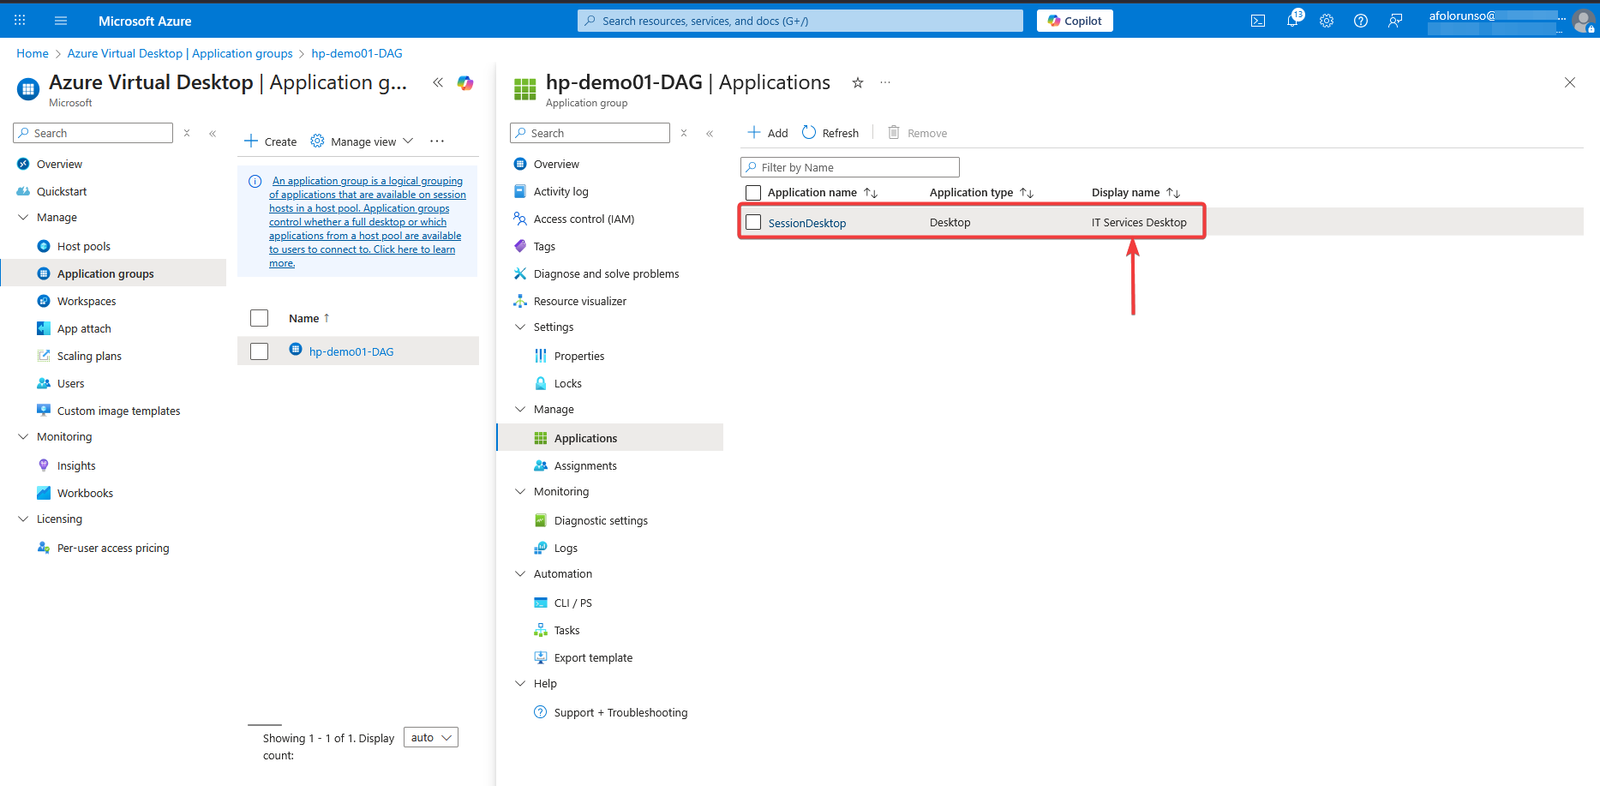
Rename Session Desktop (Optional)
By default, after the host pool is created, the session desktop display name is set to SessionDesktop. You can change this to a preferred name by following the steps below:
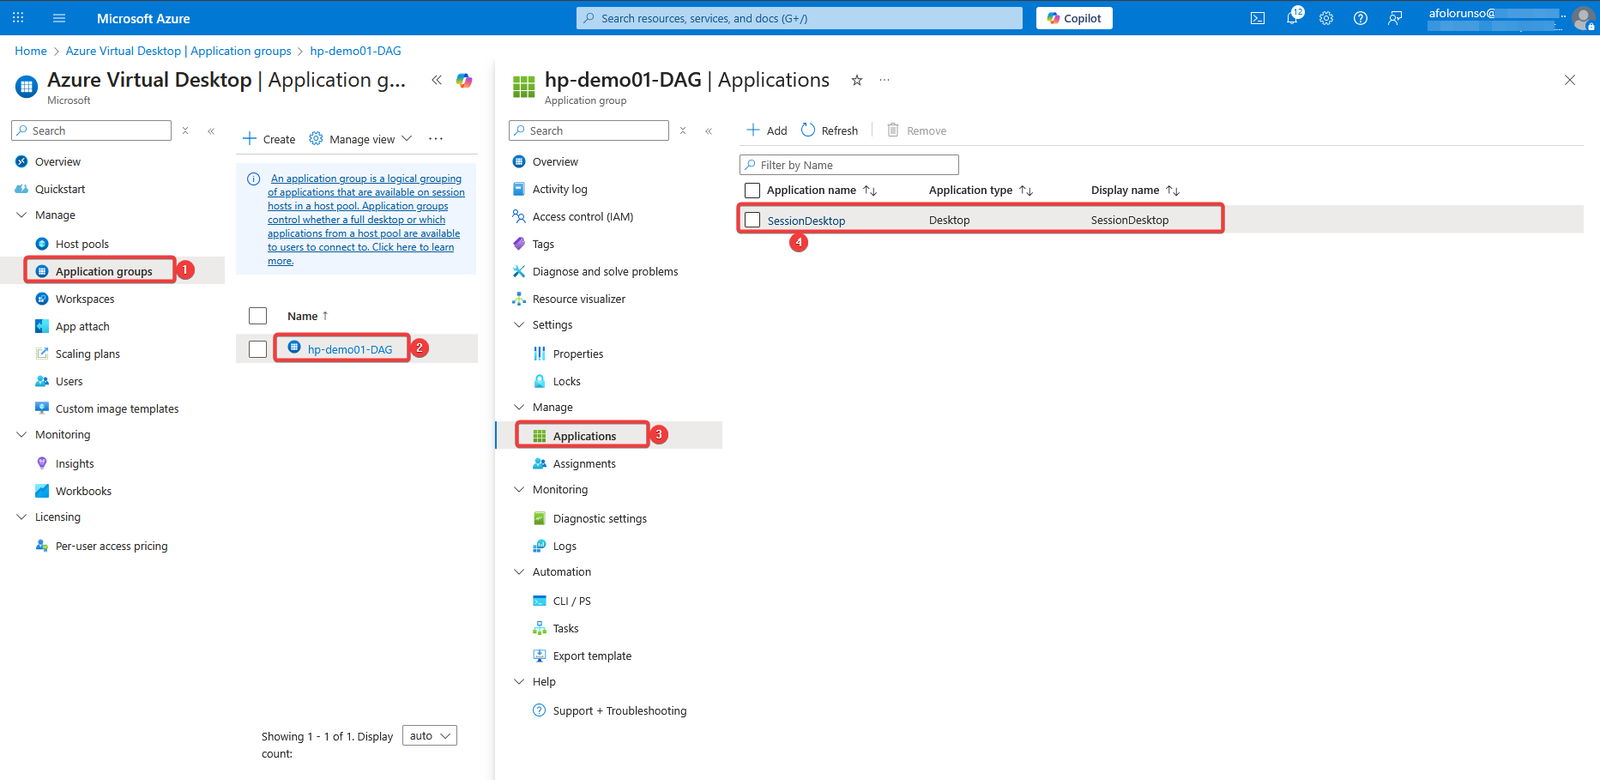
- Go to Azure Virtual Desktop in the Azure portal.
- Select Application groups.
- Select the Application group that was created as part of the host pool creation (in our case it was hp-demo01-DAG)
- Select Applications.
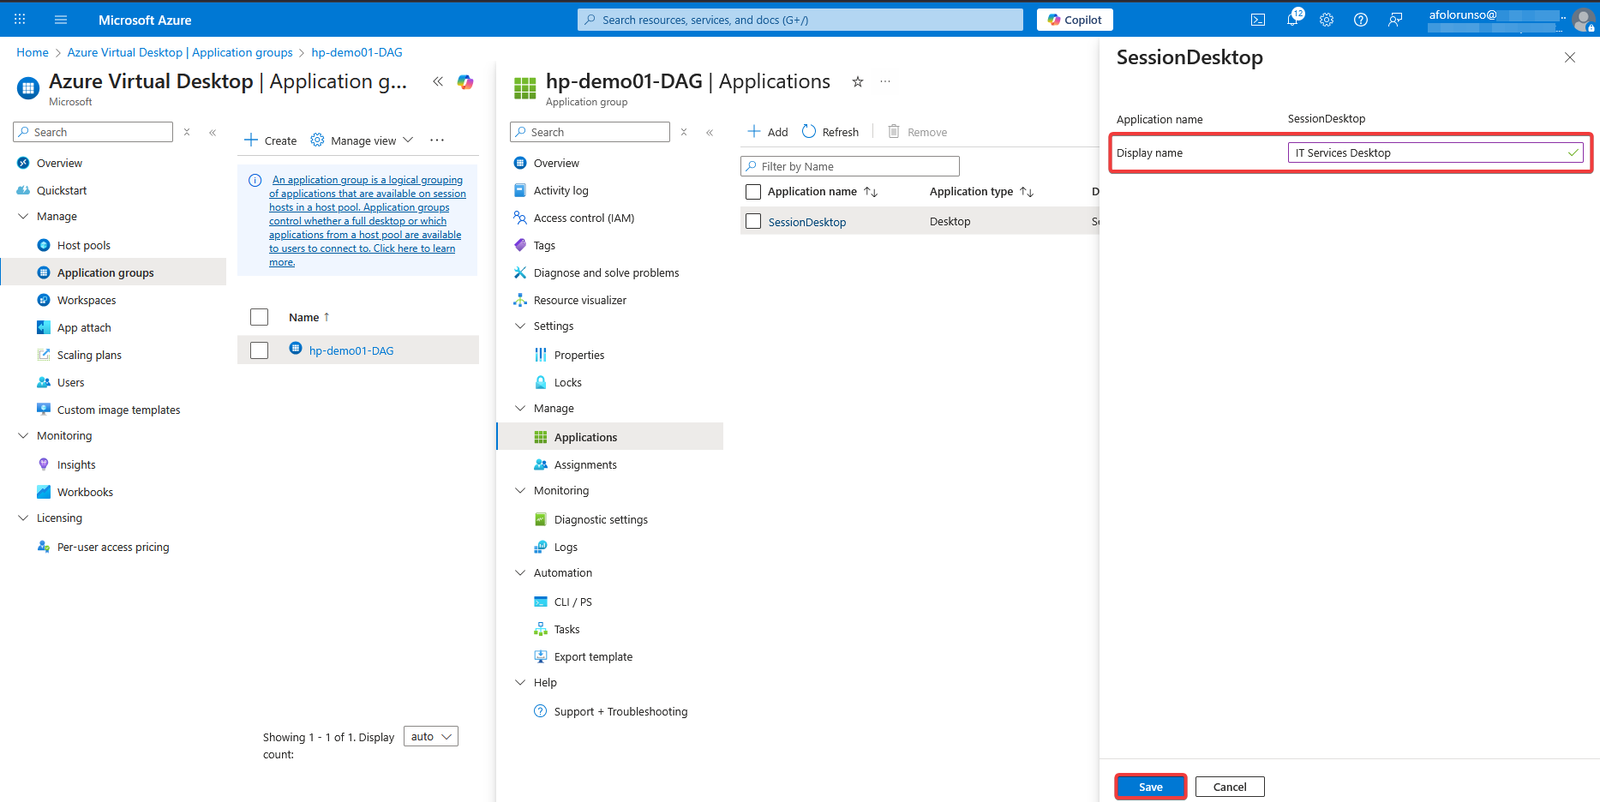
- Click on SessionDesktop.
- Change the Display name to a preferred name.
- Click Save.
Connect to your AVD
There are wo ways to access the Azure Virtual Desktop host.
- Using the Windows App.
- Using the web client.
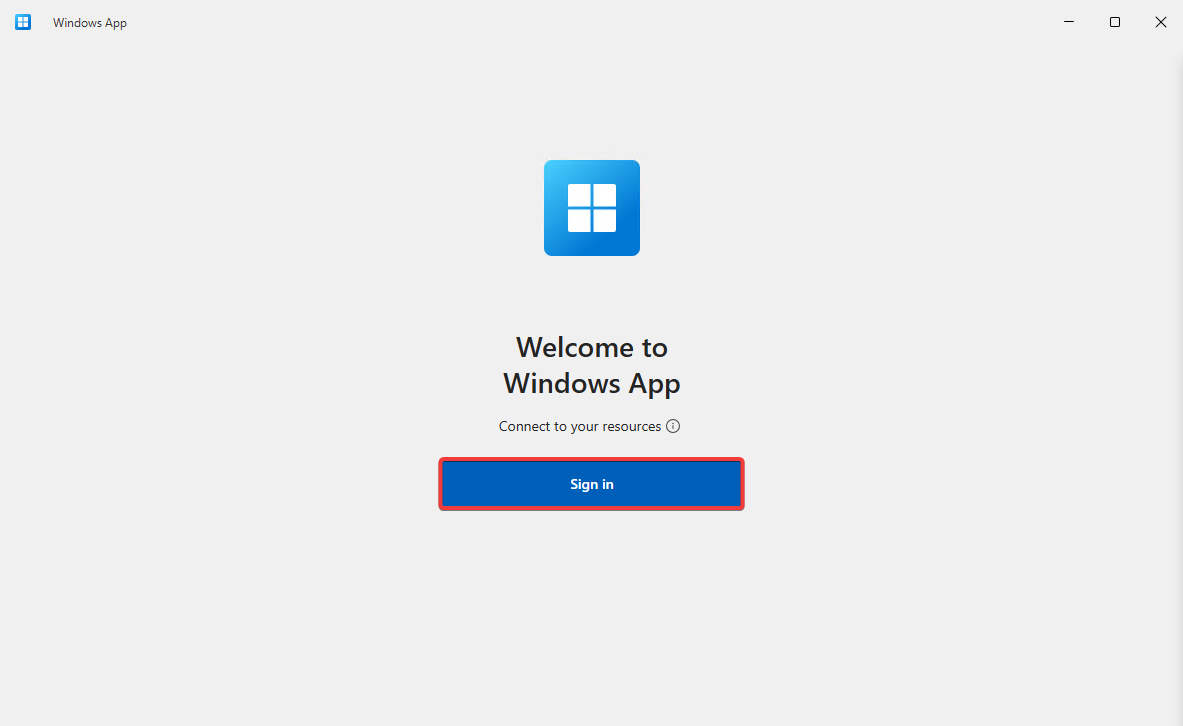
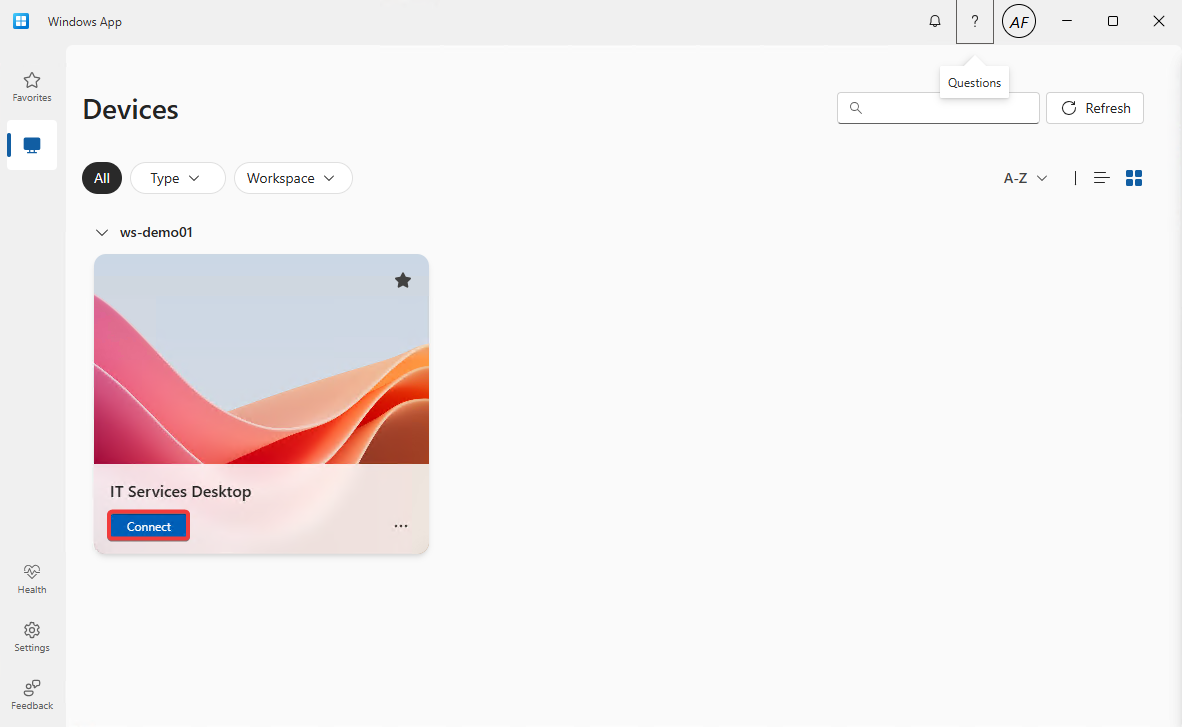
Windows App
- Download the Windows App from Microsoft store.
- Install the Windows App on your local pc.
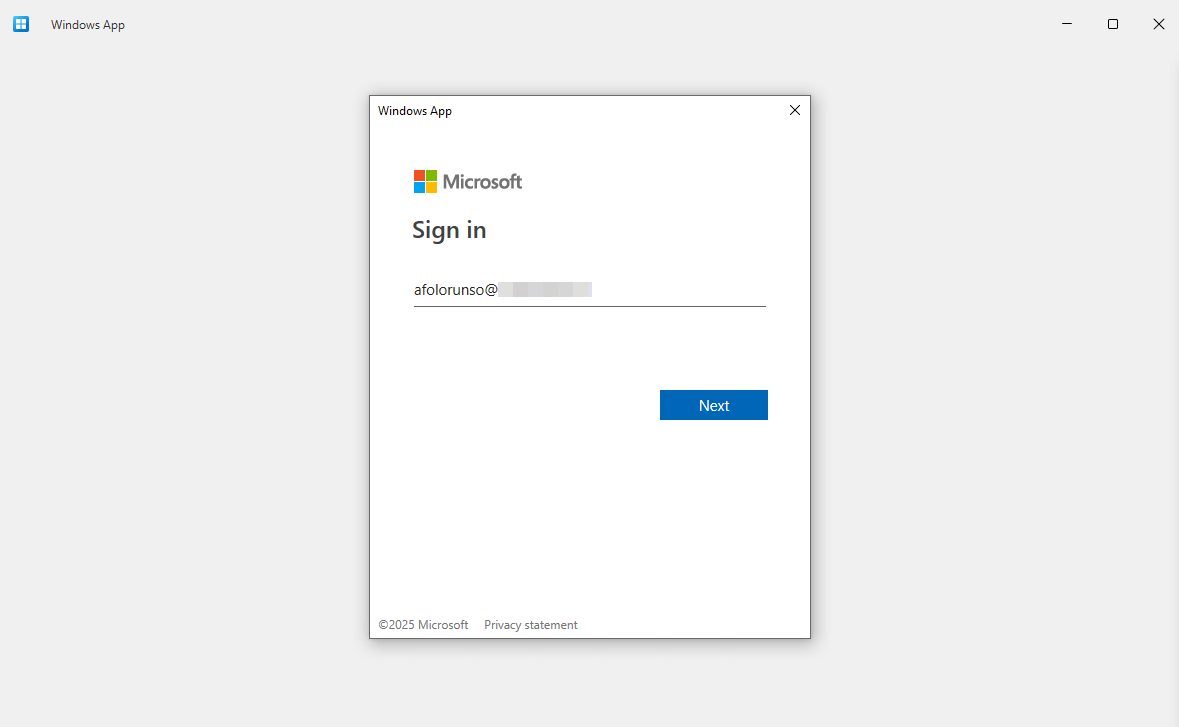
- Open the Windows App and click on Sign in.
- Provide your credentials )The account you’re using to connect must be a member of the AVD Users or Admin group that was previously granted access to the session host)
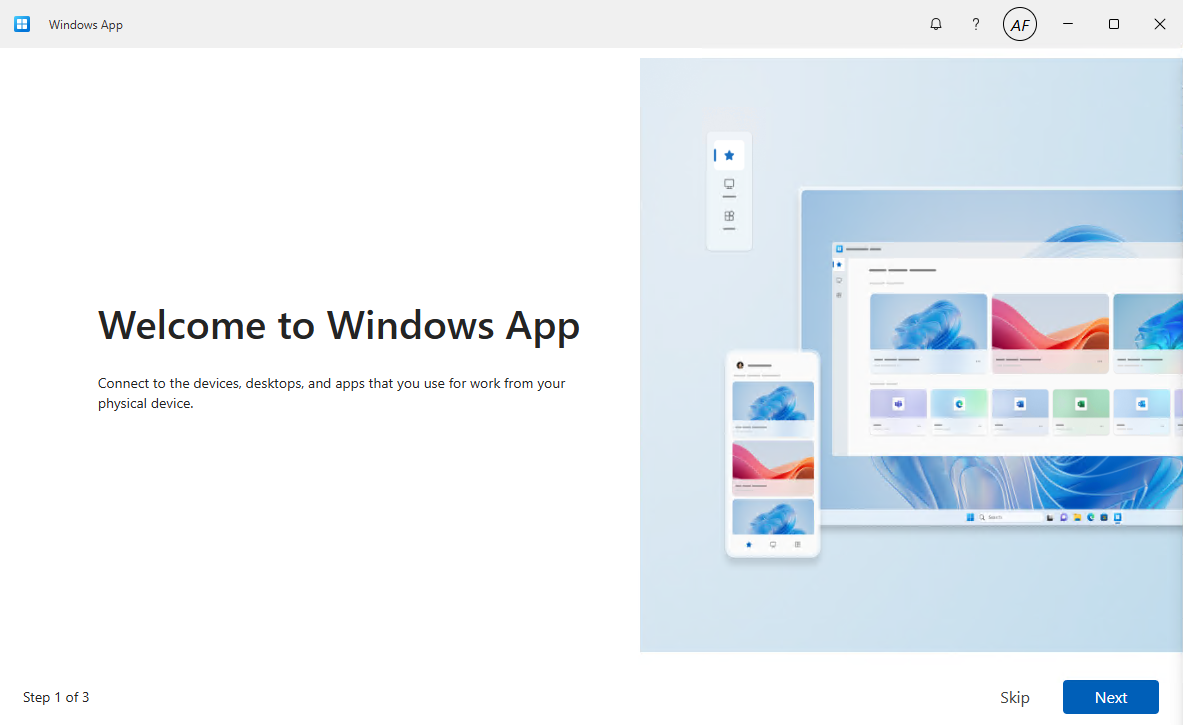
- Select Skip or Next and Done.
- Next click Connect and enter your credentials once again. You should now have access to your AVD.
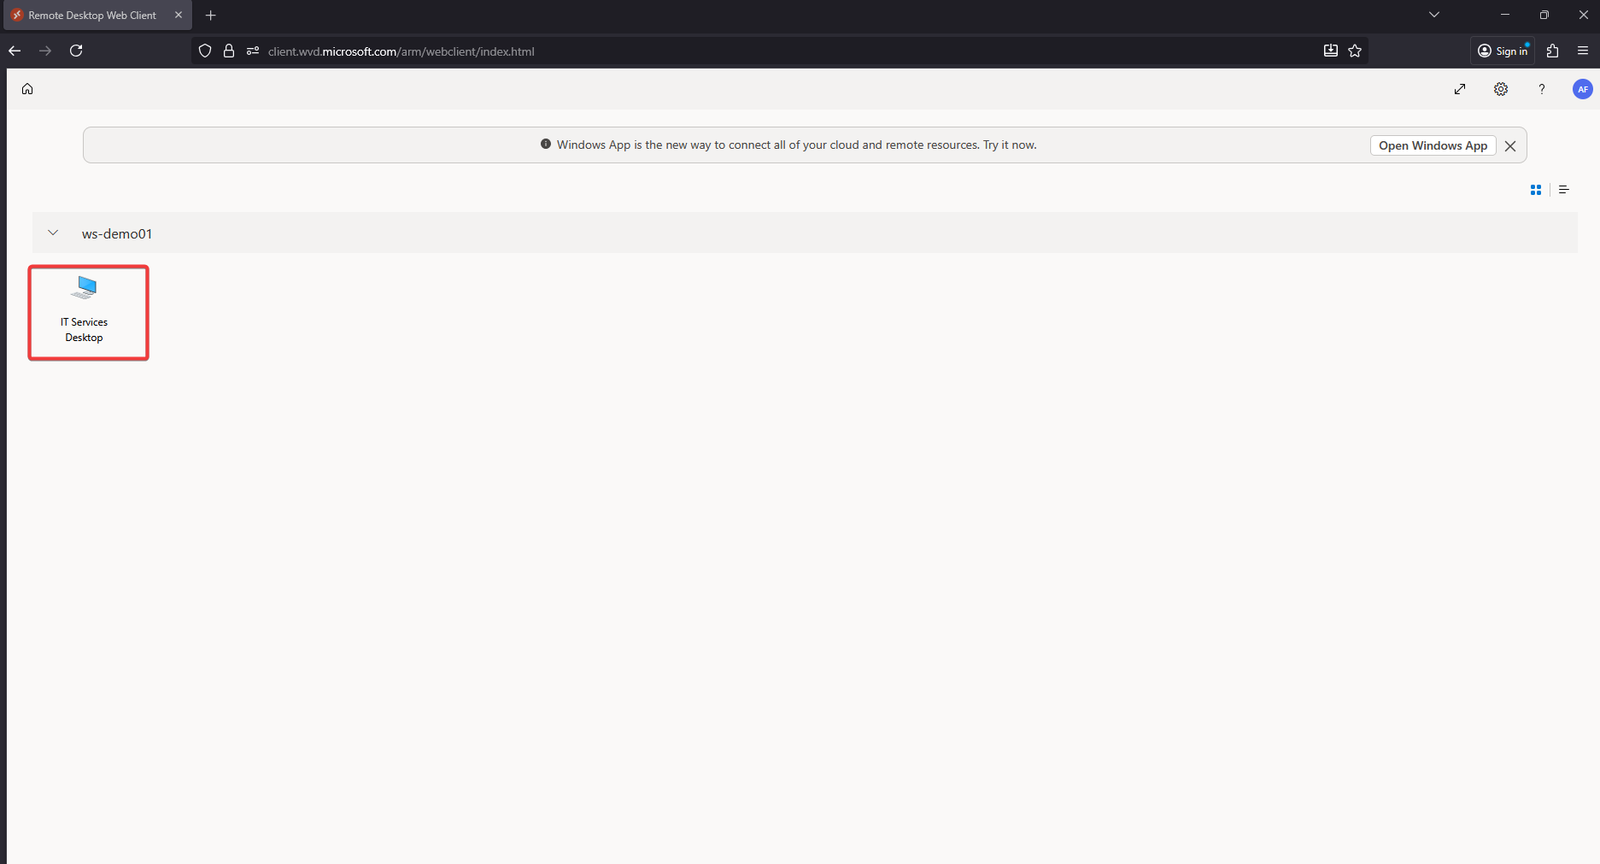
- Web Client
- Open a new browser window and paste the url https://rdweb.wvd.microsoft.com/arm/webclient
- Sign in with the account of a user that’s a member of the AVD Admin or AVD Users group
- Click on the Session Desktop (IT Services Desktop in our case) and you should have your AVD.
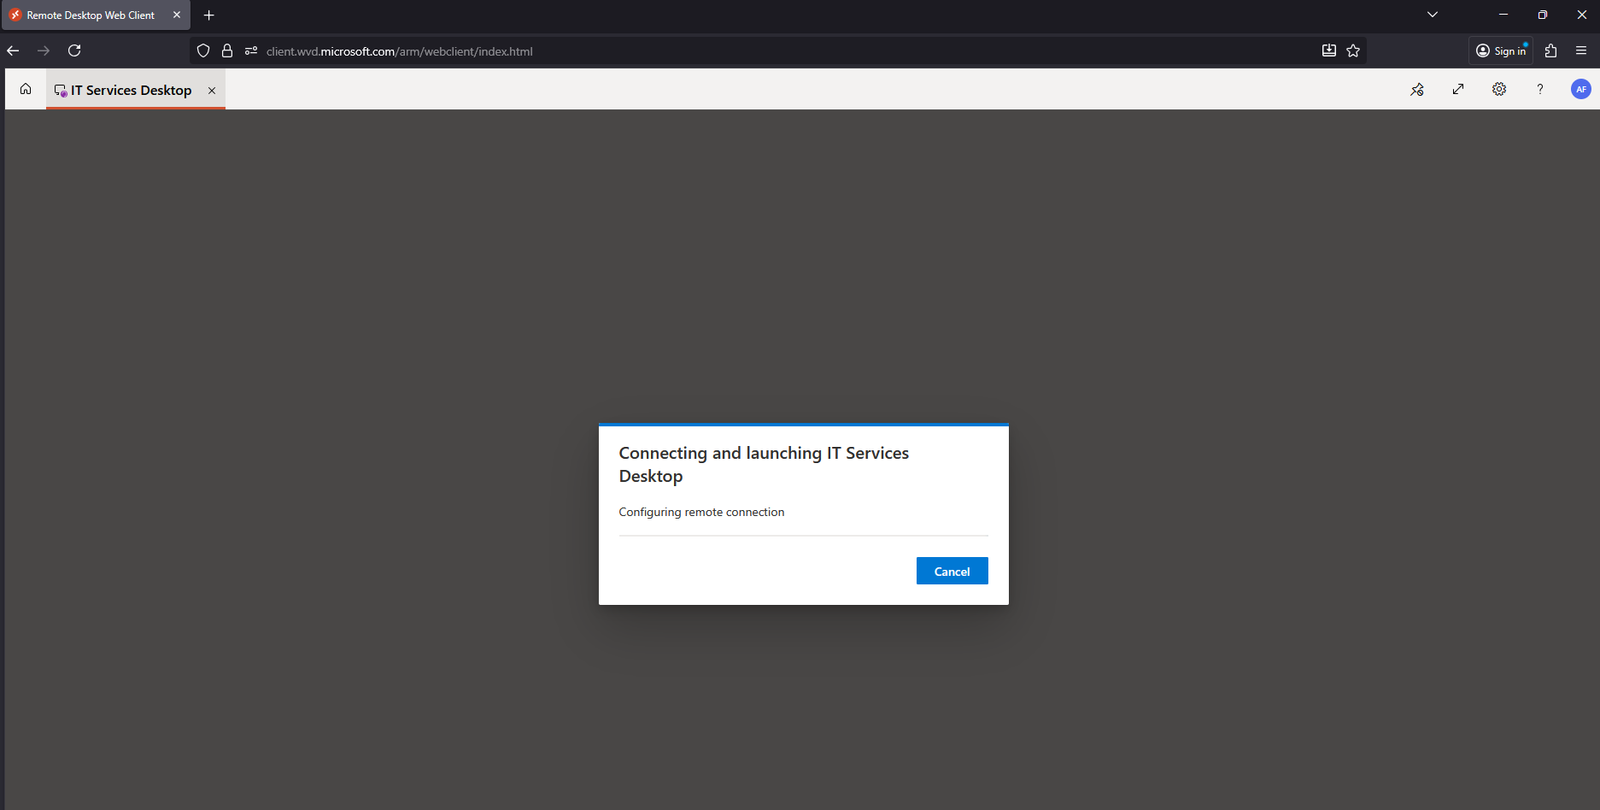
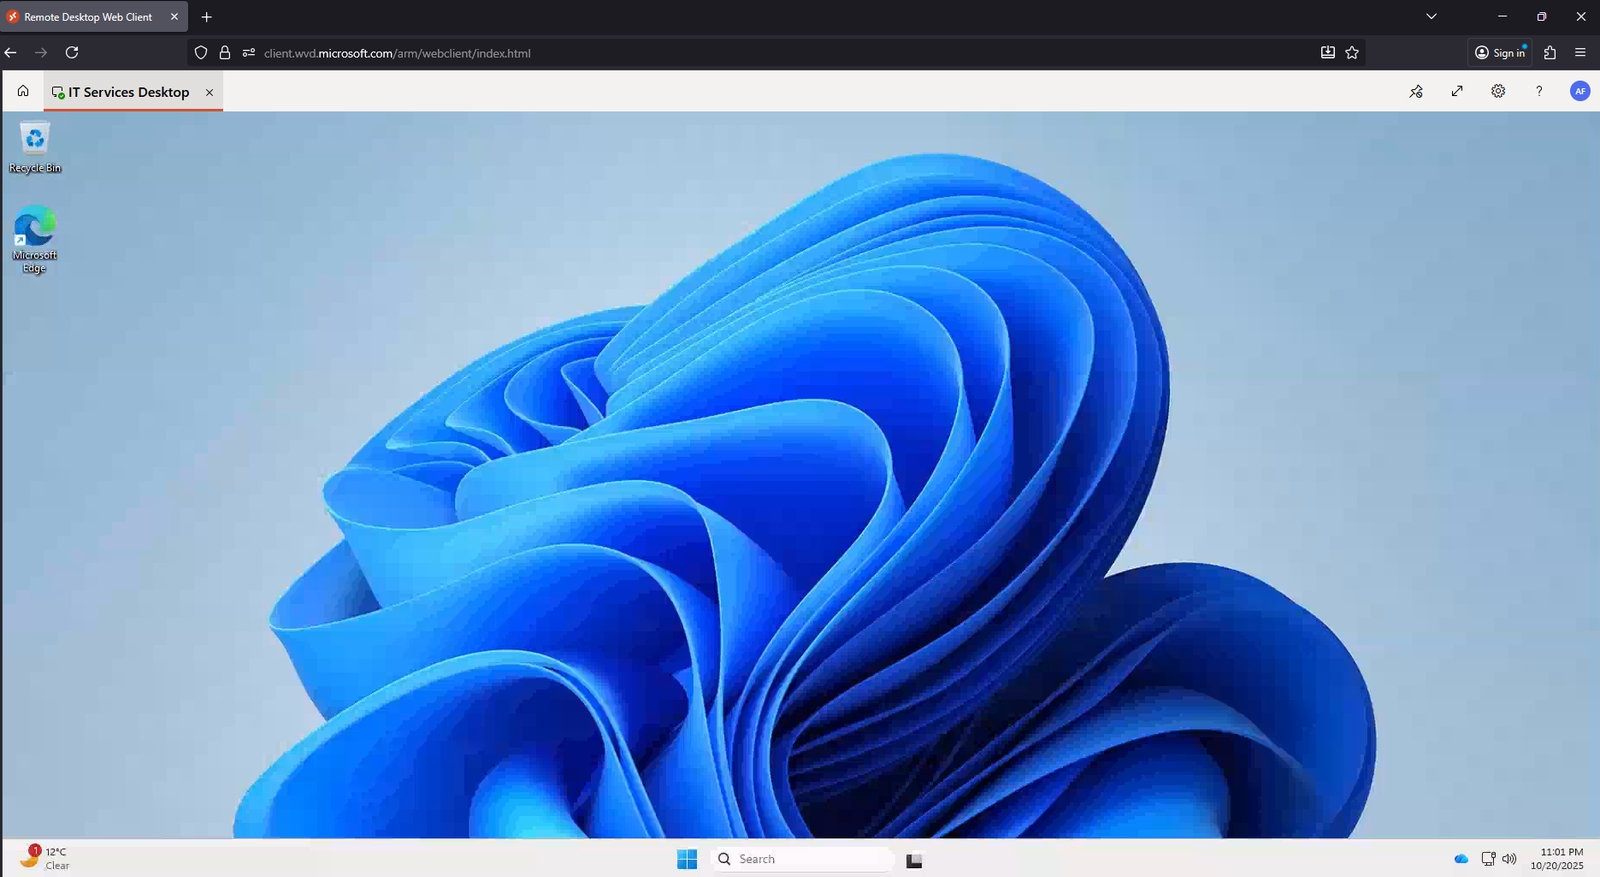
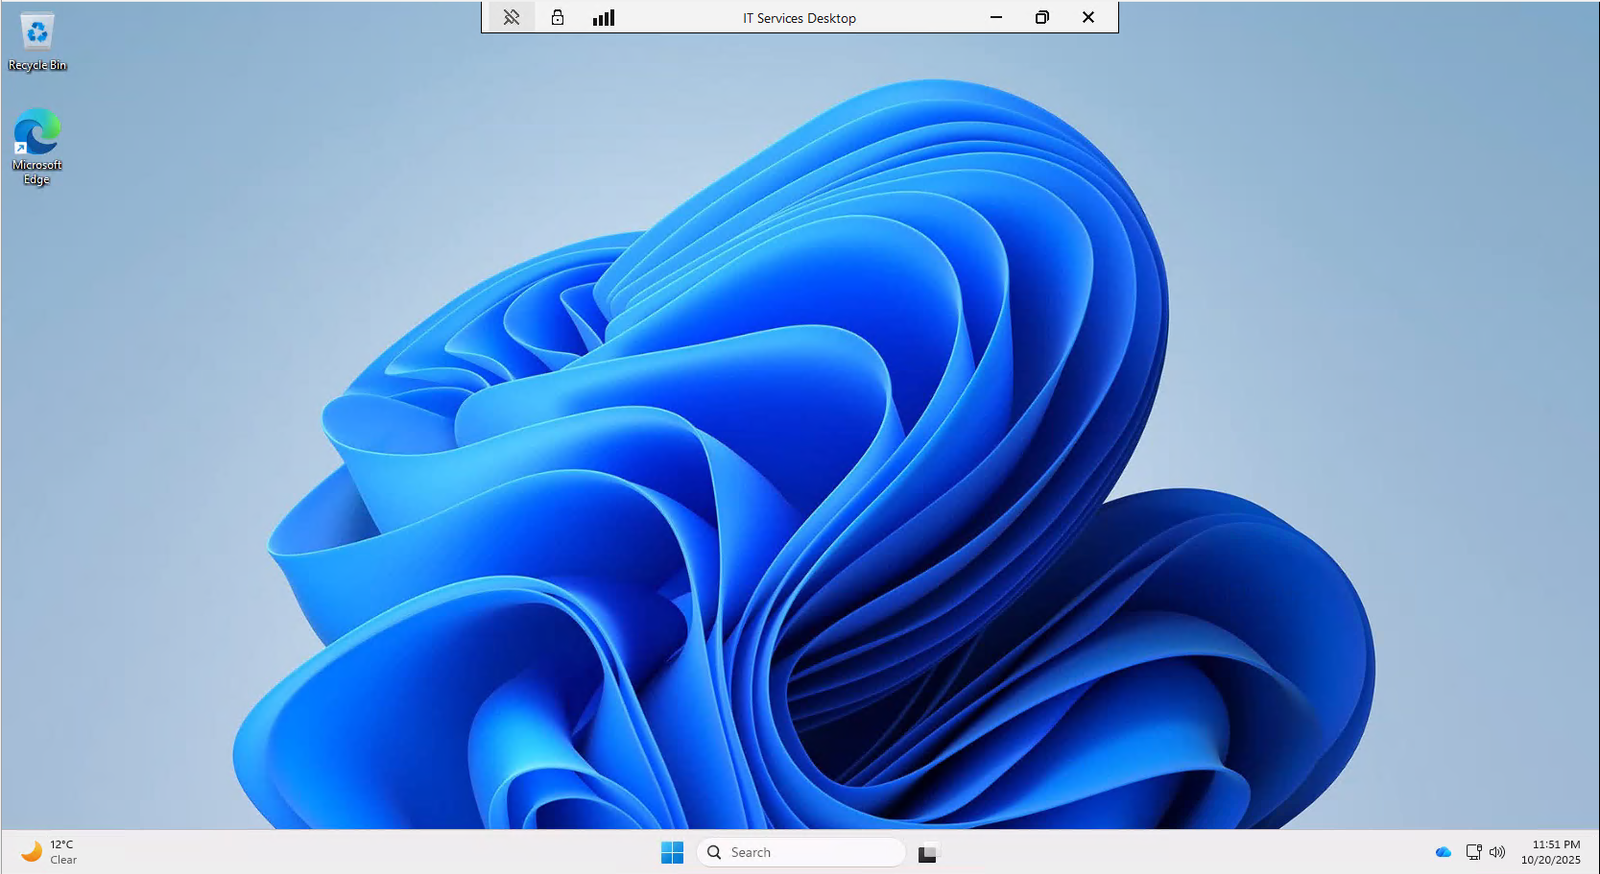
Regardless of which connection method you use, after entering your username and password, you should see the workspace you created along with the session desktop listed under it. Double-click the session desktop to connect, your Azure Virtual Desktop will then load.
Take a moment to explore your virtual desktop. You’ll find your Office applications, File Explorer, and other essential Windows apps available.